
Kia Stinger CK: Lubrication System / Engine Oil
Flow diagram
| Flow Diagram |
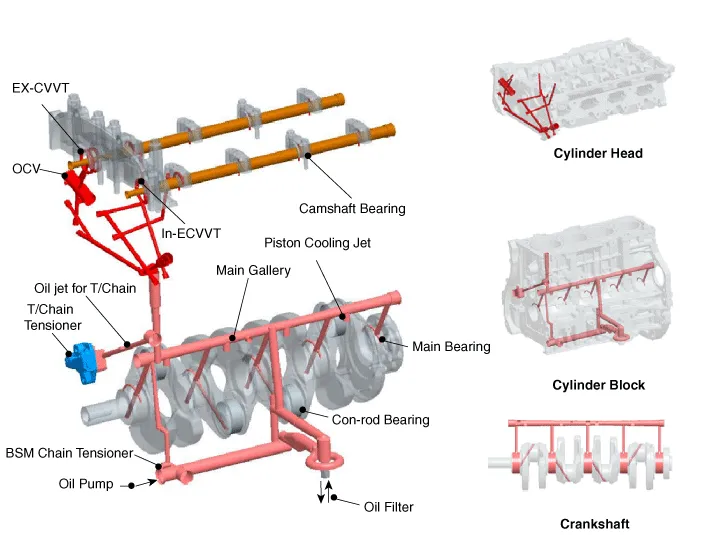
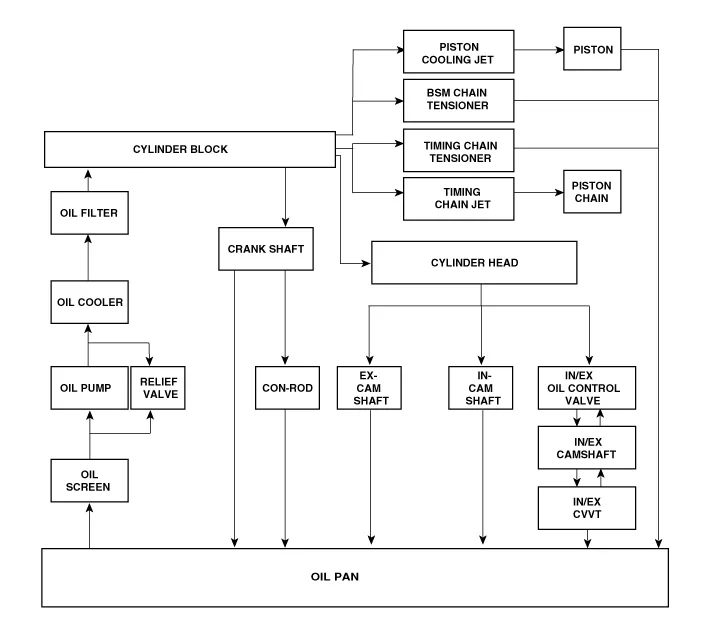
Repair procedures
| Oil and filter replacement |
|

| 1. |
Remove the engine room front and rear under cover. (Refer to Engine and Transmission Assembly - "Engine Room Under Cover") |
| 2. |
Drain the engine oil.
|
| 3. |
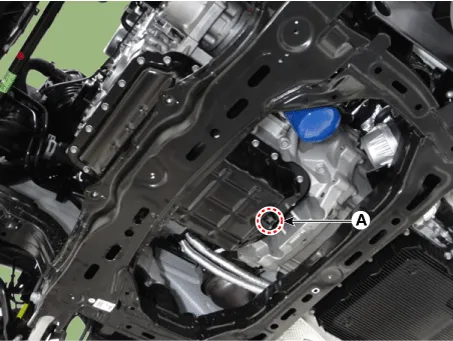
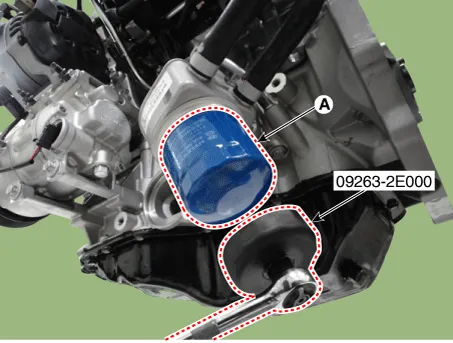
Remove the oil filter (A) with the SST (09263-2E000, the oil filter wrench).
|
| 4. |
Install the oil drain plug with a new gasket.
|
| 5. |
Fill with new engine oil, after removing the engine oil level gauge.
|
| 6. |
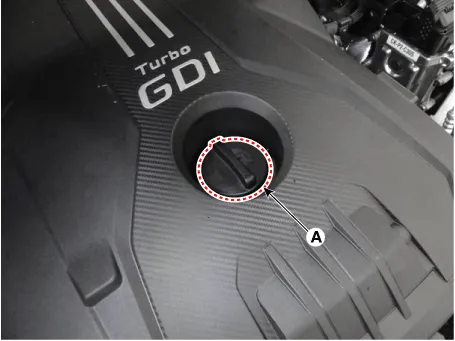
Install the oil filler cap. |
| 7. |
Start engine and check for oil leaks and check the oil gauge or light for an indication of oil pressure. |
| 8. |
Recheck the engine oil level. |
| 9. |
To reset the service interval to the recommended mileage, refer to the service mode section in the owner's manual for procedure (if applicable). |
| Inspection |
| 1. |
Check the engine oil quality. Check the oil deterioration, entry of water, discoloring of thinning. If the quality is visibly poor, replace the oil. |
| 2. |
Check the engine oil level. After engine warm up stop the engine wait 5 minutes then check the oil level. Oil level should be between the "L" and "F" marks on the dipstick. If low check for leakage and add oil up to the "F" mark.
|

Selection Of Engine Oil
Recommendation : ACEA C2 or above / 0W-30
Allowed oil grade
- API SL or above
- ILSAC GF-3 or above
- ACEA A3 or above
Allowed oil SAE viscosity
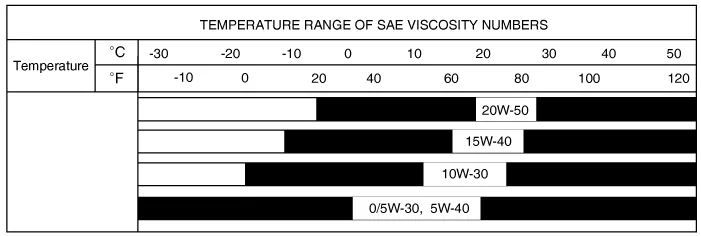
For best performance and maximum protection of all types of operation, select only those lubricants which :
|


Other information:
Kia Stinger (CK) 2018-2023 Service Manual: Specifications
Service data Service Data Items Specification Hood Type Rear hinged, gas lifter type Front Door Structure Front hinged, full door structure Regulator system Wire drum type Locking system Pin-fork system Rear Door Structure Front hinged, full door structure Regulator system Wire drum type Locking system Pin-fork system Trunk Lid Type Front hinged, power trunk lid type (option ) Seat Belts Front 3-point type with Emergency Locking Retractor (E.Kia Stinger (CK) 2018-2023 Service Manual: Luggage Side Trim
Components and components location Component Location 1. Rear transverse trim Repair procedures Replacement Put on gloves to protect your hands. • Use a plastic panel removal tool to remove interior trim pieces without marring the surface.Categories
- Manuals Home
- Kia Stinger Owners Manual
- Kia Stinger Service Manual
- New on site
- Most important about car
