
Kia Stinger CK: Intake And Exhaust System / Muffler
Components and components location
| Components |
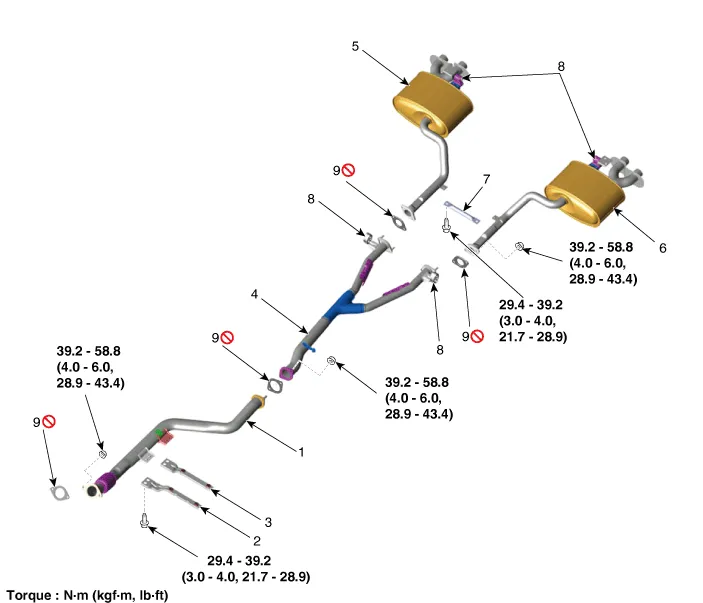
| 1. Front
muffler 2. Front muffler bracket (2WD) 3. Front muffler bracket (AWD) 4. Center muffler 5. Rear muffler (RH) |
6. Rear
muffler (LH) 7. Rear muffler bracket 8. Rubber hanger 9. Gasket |
Repair procedures
| Removal and Installation |
Front Muffler
| 1. |
Remove the engine room rear under cover. (Refer to Engine and Transmission Assembly - "Engine Room Under Cover") |
| 2. |
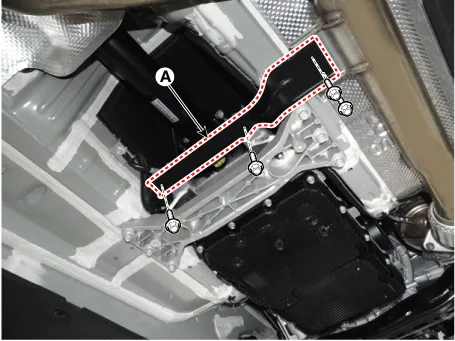
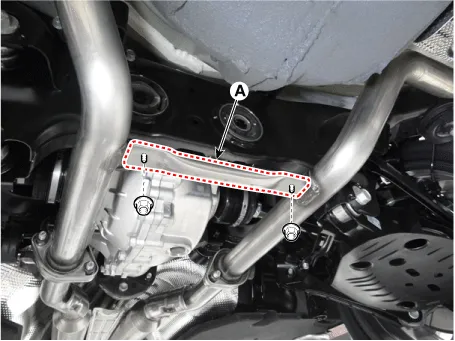
Remove the front muffler bracket (A).
|
| 3. |
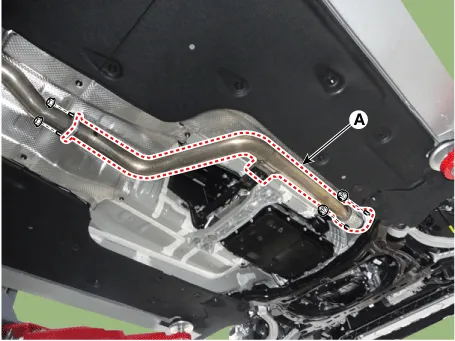
Remove the front muffler (A).
|

| 4. |
Install in the reverse order of removal. |
Center Muffler
| 1. |
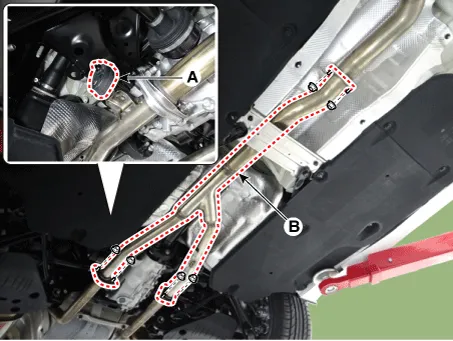
Detach the rubber hanger (A) from the center muffler. |
| 2. |
Remove the center muffler (B).
|
| 3. |
Install in the reverse order of removal. |
LH Rear Muffler
| 1. |
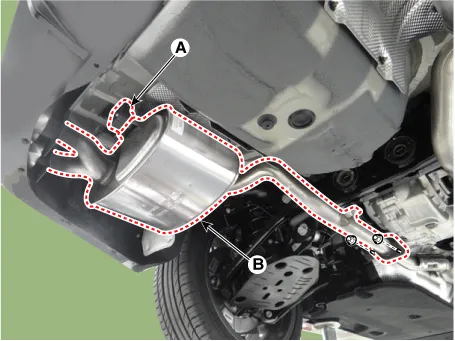
Remove the rear muffler bracket (A).
|
| 2. |
Detach the hanger (A) from the LH rear muffler. |
| 3. |
Remove the LH rear muffler (B).
|
| 4. |
Install in the reverse order of removal.
|
RH Rear Muffler
| 1. |
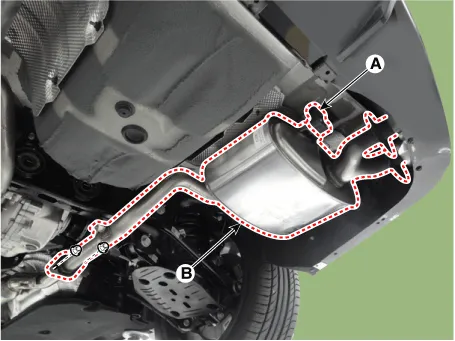
Remove the rear muffler bracket (A).
|
| 2. |
Detach the hanger (A) from the RH rear muffler. |
| 3. |
Remove the RH rear muffler (B).
|
| 4. |
Install in the reverse order of removal.
|


Other information:
Kia Stinger (CK) 2018-2023 Service Manual: Hood Latch Release Handle
Components and components location Component Location 1. Hood latch release handle Repair procedures Replacement 1. After loosening the mounting screw, remove the hood latch release handle (A). 2. Install in the reverse order of removal.Kia Stinger (CK) 2018-2023 Service Manual: Front Pillar Trim
Components and components location Component Location 1. Front pillar trim Repair procedures Replacement Put on gloves to protect your hands. • Use a plastic panel removal tool to remove interior trim pieces without marring the surface.Categories
- Manuals Home
- Kia Stinger Owners Manual
- Kia Stinger Service Manual
- New on site
- Most important about car
