Kia Stinger CK: Engine Mechanical System / Engine And Transmission Assembly
Kia Stinger (CK) 2018-2023 Service Manual / Engine Mechanical System / Engine And Transmission Assembly
Contents:
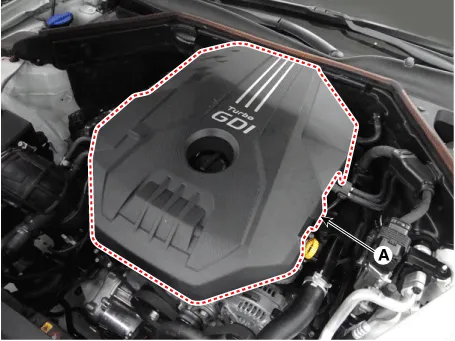
Engine Cover
Repair procedures
| Removal and Installation |
| 1. |
Remove the engine cover (A).
|

| 2. |
Install in the reverse order of removal. |
Engine Room Under Cover ➤
Engine Mounting ➤
Engine And Transmission Assembly ➤


Other information:
Kia Stinger (CK) 2018-2023 Service Manual: Cluster Fascia Panel
Components and components location Component Location 1. Cluster fascia panel Repair procedures Replacement Put on gloves to protect your hands. • Use a plastic panel removal tool to remove interior trim pieces without marring the surface.Kia Stinger (CK) 2018-2023 Service Manual: Front Seat Cushion Cover
Components and components location Component Location 1. Front seat cushion cover Repair procedures Replacement Put on gloves to protect your hands. • Use a plastic panel removal tool to remove interior trim pieces without marring the surface.Categories
- Manuals Home
- Kia Stinger Owners Manual
- Kia Stinger Service Manual
- New on site
- Most important about car
Contents

Copyright © 2026 www.kstinger.com 0.0103