
Kia Stinger CK: Front Door / Front Door Window Glass
Components and components location
| Component Location |
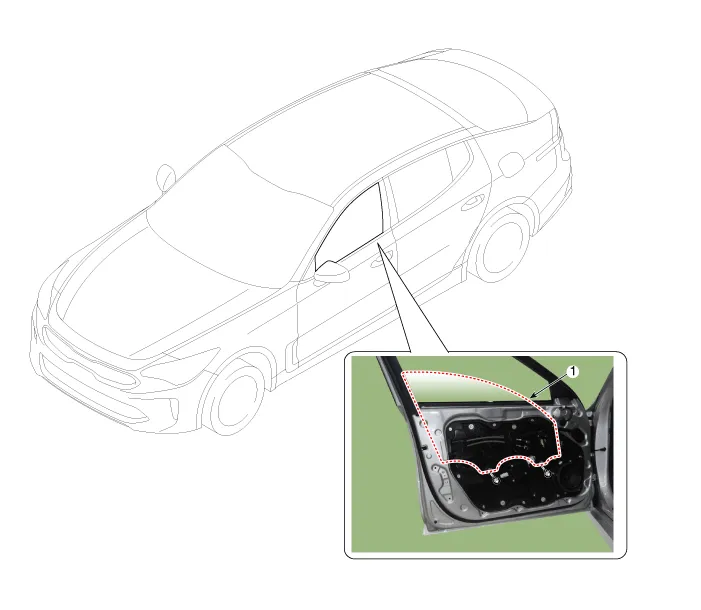
| 1. Front door window glass
|
Repair procedures
| Replacement |
Put on gloves to protect your hands. |

|

| 1. |
Remove the front door trim. (Refer to Front Door - "Front Door Trim") |
| 2. |
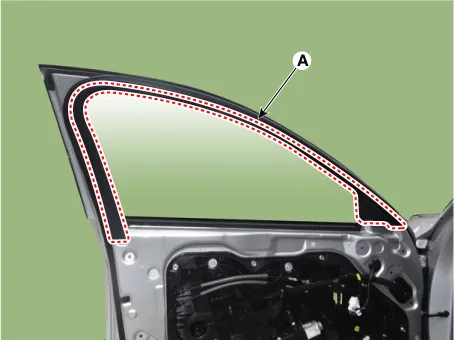
Remove the front door frame inner cover (A) by using a remover.
|
| 3. |
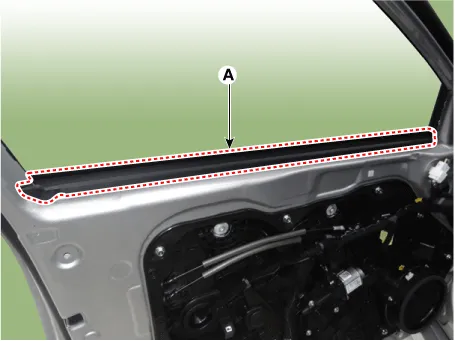
Remove the front door belt inside weatherstrip (A).
|
| 4. |
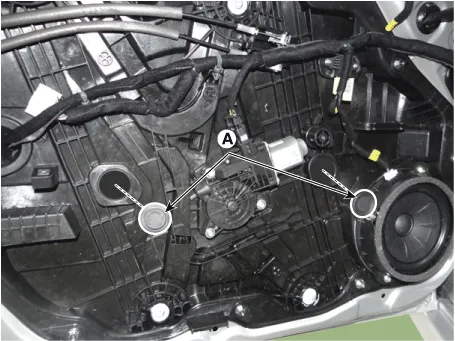
Remove the front door window glass mounting hole plug (A) from the door module.
|
| 5. |
By operating the power window switch, pull down until the glass mounting bolt on plug hole is visible.
|
| 6. |
Loosen the mounting bolt and then pull out the front door window glass (A) by tilting it sideways.
|
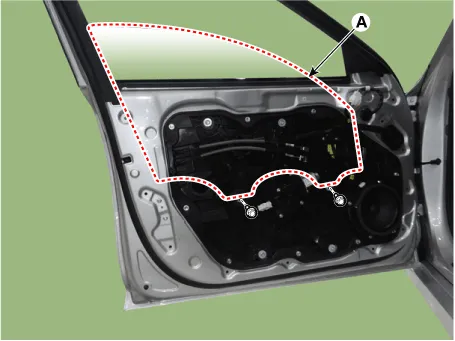
| 7. |
Install in the reverse order of removal.
|


Other information:
Kia Stinger (CK) 2018-2023 Service Manual: SRS components and functions
The SRS consists of the following components: 1. Driver's front air bag module 2. Passenger's front air bag module 3. Side air bag modules 4. Curtain air bag modules 5. Retractor pre-tensioner assemblies 6. Air bag warning light 7. SRS control module (SRSCM) / Rollover sensor 8. Front impact sensors 9. Side impact sensors 10. PASSENGER AIR BAG “OFF” indicator (Front passenger’s seat only) 11.Kia Stinger (CK) 2018-2023 Service Manual: Wide Sunroof Assembly
Components and components location Components Location 1. Wide sunroof assembly Repair procedures Removal • To remove the panorama sunroof assembly, use the tools shown in the following figure: [Tools Composition] ① Square wire ② Insert-type wire grip [Tool Assembly] • Insert and affix square wire ① into the insert hole of the wire grip ②.Categories
- Manuals Home
- Kia Stinger Owners Manual
- Kia Stinger Service Manual
- New on site
- Most important about car
