Kia Stinger CK: Wide Sunroof / Wide Sunroof Switch
Components and components location
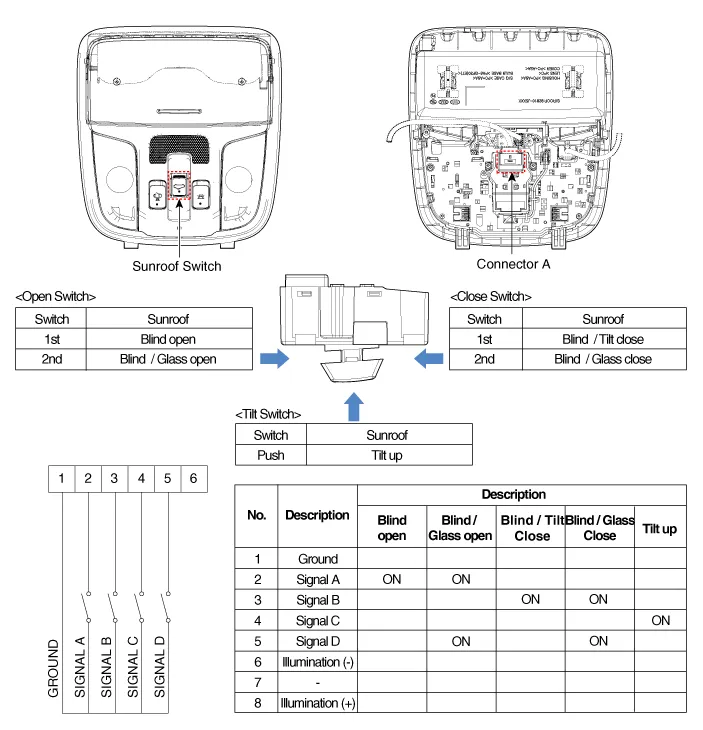
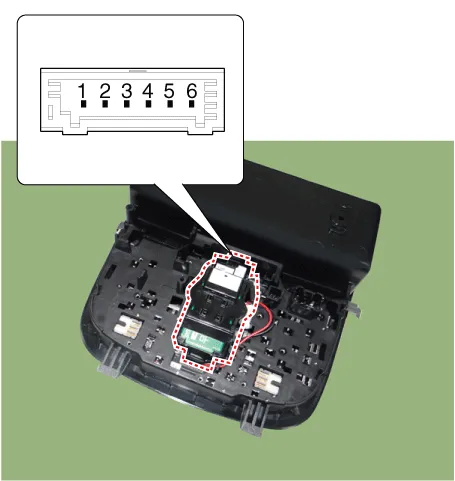
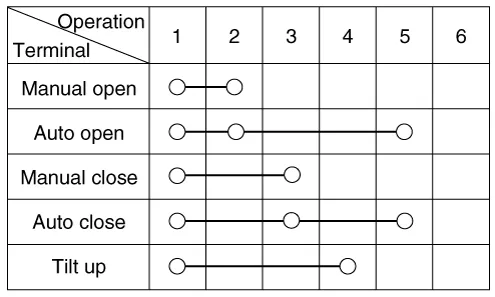
| Components |
Repair procedures
| Inspection |
| 1. |
Disconnect the negative (-) battery terminal. |
| 2. |
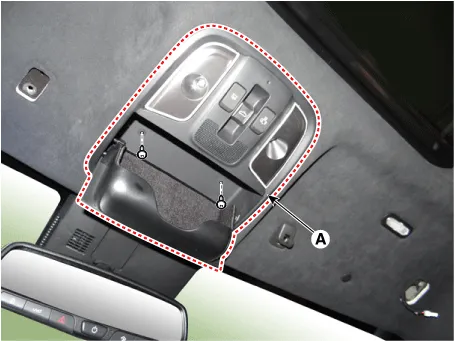
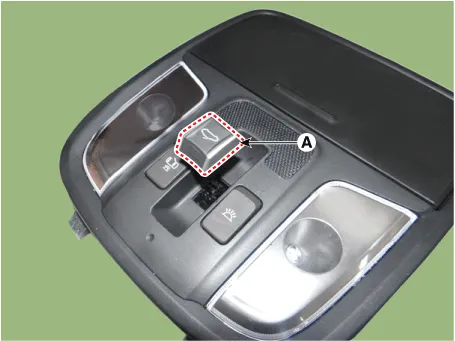
Remove the overhead console lamp (A) after loosening the mounting screws.
|
| 3. |
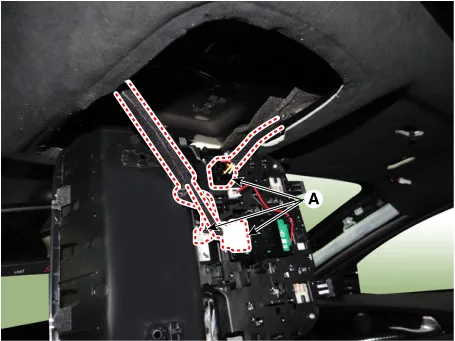
Disconnect the overhead console lamp connectors (A).
|
| 4. |
Check for continuity between the terminals. If the continuity is not shown as specified, replace the wide sunroof switch.
|
| Removal |
| 1. |
Disconnect the negative (-) battery terminal. |
| 2. |
Remove the overhead console lamp (A) after loosening the mounting screws.
|
| 3. |
Disconnect the overhead console lamp connectors (A).
|
| 4. |
Remove the wide sunroof switch knob (A).
|
| 5. |
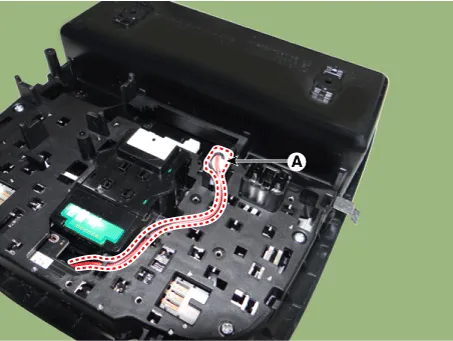
Disconnect the overhead console lamp connector (A).
|
| 6. |
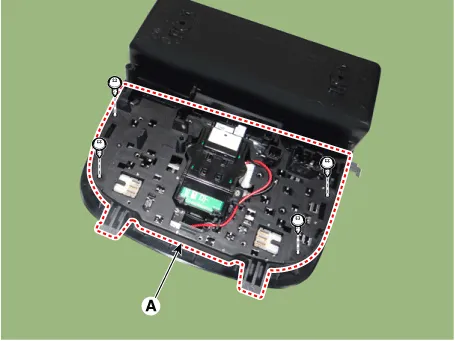
Remove the overhead console lamp cover (A) after loosening the mounting screws.
|
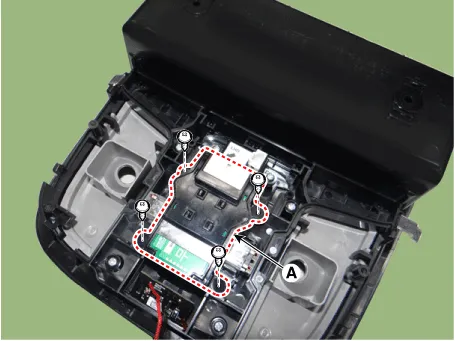
| 7. |
Remove the wide sunroof switch (A) after loosening the mounting screws.
|
| Installation |
| 1. |
Install the wide sunroof switch. |
| 2. |
Install the overhead console lamp cover. |
| 3. |
Connect the overhead console lamp connector. |
| 4. |
Install the wide sunroof switch knob. |
| 5. |
Connect the overhead console lamp connectors. |
| 6. |
Install the overhead console lamp. |
| 7. |
Connect the negative (-) battery terminal. |


Other information:
Kia Stinger (CK) 2018-2023 Service Manual: Cylinder Block
Repair procedures Disassembly In case of removing the high pressure fuel pump, high pressure fuel pipe, delivery pipe, and injector, there may be injury caused by leakage of the high pressure fuel. So don’t do any repair work right after engine stops. • Use fender covers to avoid damaging painted surfaces.Kia Stinger (CK) 2018-2023 Service Manual: Climate Control Air Filter
Description and operation Description Located in the blower unit, the climate control air filter eliminates foreign materials and odor. The particle filter performs the roles of an odor filter as well as a conventional dust filter to ensure pleasant interior environment. Repair procedures Replacement 1. Remove the stopper (B) from the glove box (A).Categories
- Manuals Home
- Kia Stinger Owners Manual
- Kia Stinger Service Manual
- New on site
- Most important about car
