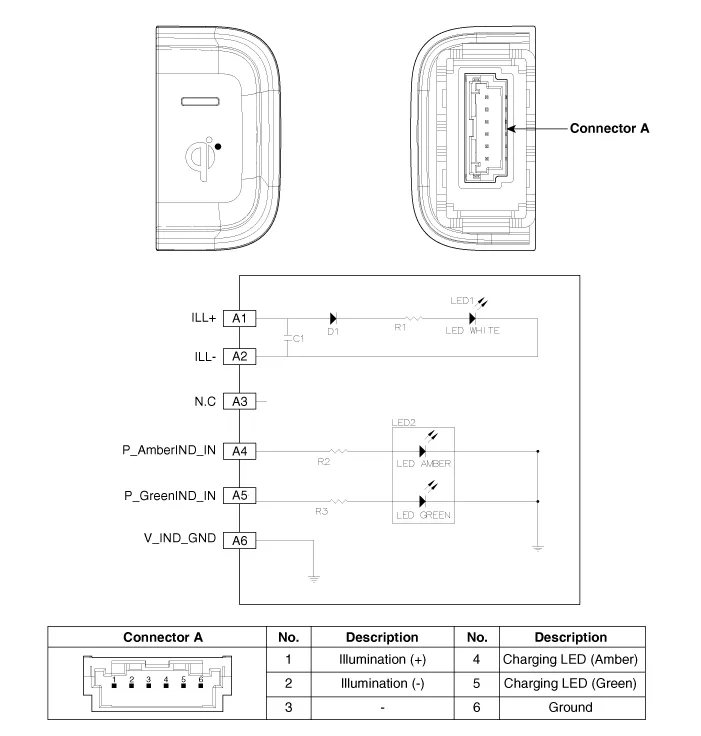
Kia Stinger CK: Wireless Power Charger (WPC) System / Wireless Power Charging (WPC) Lamp
Components and positions
| Components |
Repair procedures
| Removal |
|

|

| 1. |
Disconnect the negative (-) battery terminal. |
| 2. |
Remove the console complete assembly. (Refer to Body - "Floor Console Assembly") |
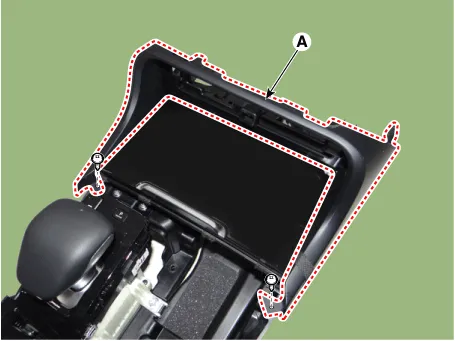
| 3. |
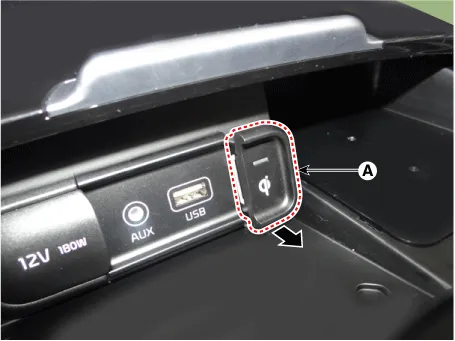
Remove the front cover (A) after loosening the mounting screws.
|
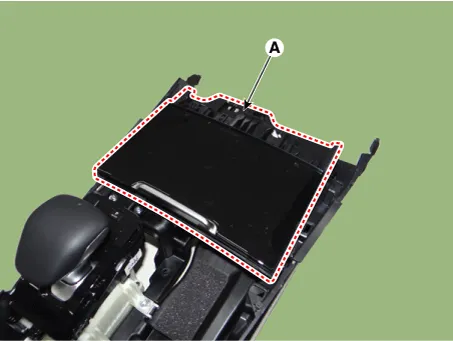
| 4. |
Remove the floor console tray (A) by using a remover.
|
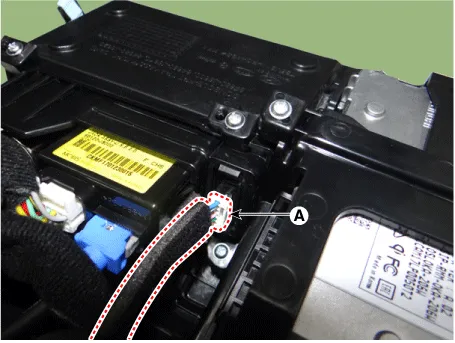
| 5. |
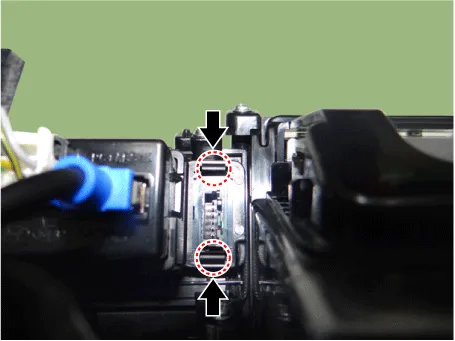
Disconnect the wireless power charging lamp connector (A).
|
| 6. |
Remove the wireless power charging lamp (A) by pressing the fixing hooks.
|
| Installation |
| 1. |
Install the wireless power charging lamp. |
| 2. |
Connect the wireless power charging lamp connector. |
| 3. |
Install the floor console tray. |
| 4. |
Install the front cover. |
| 5. |
Install the console complete assembly. |
| 6. |
Connect the negative (-) battery terminal. |


Other information:
Kia Stinger (CK) 2018-2023 Service Manual: Electronic stability control (ESC)
The Electronic Stability control (ESC) system is designed to stabilize the vehicle during cornering maneuvers. ESC checks where you are steering and where the vehicle is actually going. ESC applies the brakes on individual wheels and intervenes with the engine management system to stabilize the vehicle. Electronic stability control (ESC) will not prevent accidents.Kia Stinger (CK) 2018-2023 Service Manual: Steering Gear Rack, Linkage and Boots
Repair procedures Inspection 1. Check the steering wheel free road. (1) Turn the steering wheel so that the front wheels are facing straight ahead. (2) Measure the distance where the steering wheel can be turned without moving the front wheels.Categories
- Manuals Home
- Kia Stinger Owners Manual
- Kia Stinger Service Manual
- New on site
- Most important about car
