Other information:
Kia Stinger (CK) 2018-2023 Service Manual: Vehicle recognition
Some vehicles ahead in your lane cannot be recognized by the sensor as follows:
- Narrow vehicles such as motorcycles or bicycles
- Vehicles offset to one side
- Slow-moving vehicles or suddendecelerating vehicles
- Stopped vehicles
- Vehicles with small rear profiles such as trailers with no loads
A vehicle ahead cannot be recognized correctly by the sensor if any of following
occurs:
- When the vehicle is pointing upwards due to overloading in the trunk or luggage
area.
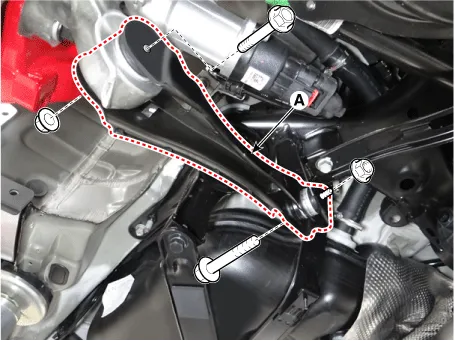
Kia Stinger (CK) 2018-2023 Service Manual: ESP(Electronic Stability Program) System
Components and components location
Components Location
1. HECU module
2. Front wheel speed sensor (2WD)
3. Front wheel speed sensor (AWD)
4. Rear wheel speed sensor
Description and operation
Description of ESP
Electronic Stability Program (ESP) recognizes critical driving conditions, such
as panic reactions in dangerous situations, and stabilizes the vehicle by wheel-individual
braking and engine control intervention.