Kia Stinger CK: Lubrication System / Oil Pressure Switch
Repair procedures
| Removal |
| 1. |
Disconnect the battery negative terminal. |
| 2. |
Remove the alternator. (Refer to Engine Electrical System - "Alternator") |
| 3. |
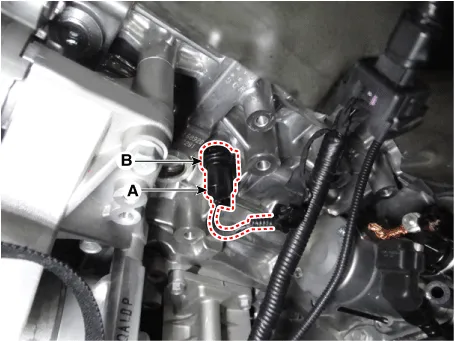
Disconnect the oil pressure switch connector (A) and then remove the oil pressure switch (B).
|
| 4. |
Install in the reverse order of removal.
|


| Inspection |
| 1. |
Check the continuity between the terminal and the body with an ohmmeter. If there is no continuity, replace the oil pressure switch.
|
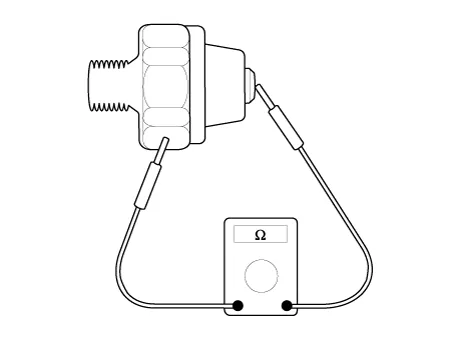
| 2. |
Check the continuity between the terminal and the body when the fine wire is pushed. If there is continuity even when the fine wire is pushed, replace the switch. |
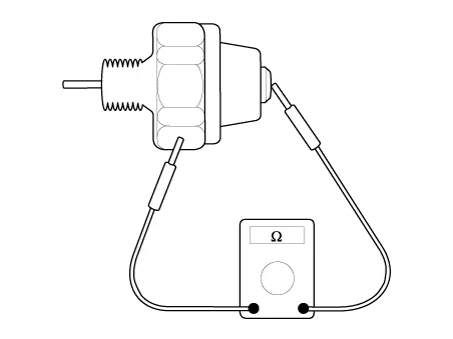
| 3. |
If there is no continuity when a 50kPa (0.50kgf/cm², 7.25psi) is applied through the oil hole, the switch is operating properly. Check for air leakage. If air leaks, the diaphragm is broken. Replace it.
|


Other information:
Kia Stinger (CK) 2018-2023 Service Manual: Air Cleaner Filter
Repair procedures Inspection 1. Remove the air cleaner element. 2. Check that the air filter is excessively dirty. If the air filter is excessively dirty, replace the air cleaner element. 3. If the air cleaner element needs to be cleaned, blow compressed air as shown in the illustration to clean it.Components and components location Component Location 1. Fuel filler door open switch 2. Fuel filler door release actuatorCategories
- Manuals Home
- Kia Stinger Owners Manual
- Kia Stinger Service Manual
- New on site
- Most important about car
