Kia Stinger: Floor Console / Rear Console Cover
Kia Stinger CK 2018-2025 Service Manual / Body (Interior and Exterior) / Floor Console / Rear Console Cover
Components and components location
| Component Location |
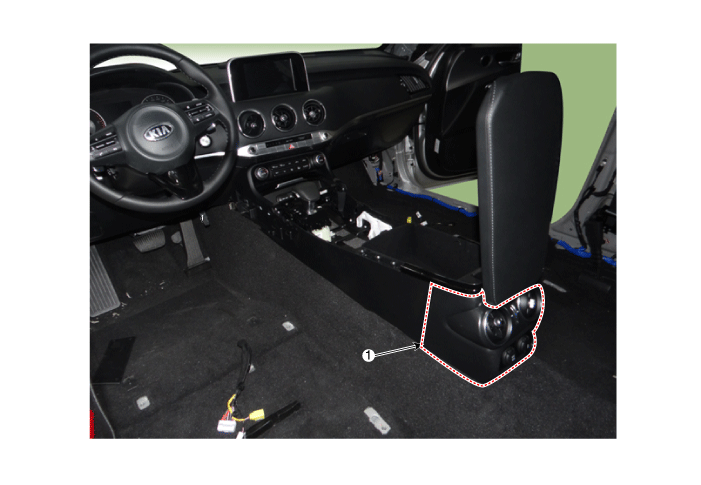
| 1. Rear console cover |
Repair procedures
| Replacement |
Put on gloves to protect your hands. |
|
| 1. |
Remove the console assembly. (Refer to Floor console - "Floor Console Assembly") |
| 2. |
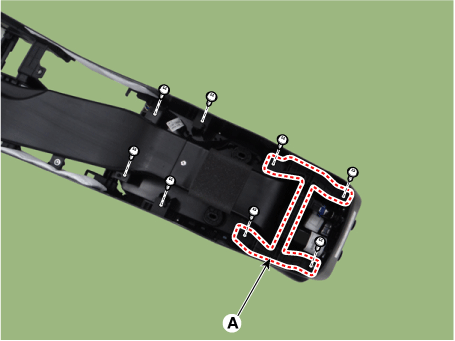
Remove the rear console bracket (A) after loosening the console lower side mounting screws.
|
| 3. |
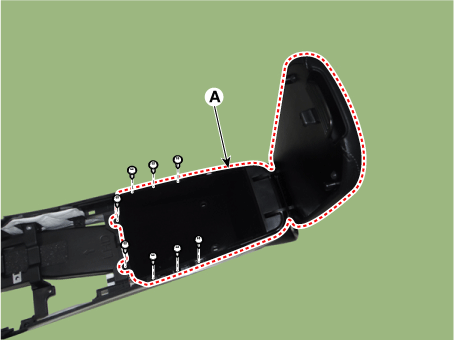
Remove the console storage box & armrest(A) after loosening the mounting screws.
|
| 4. |
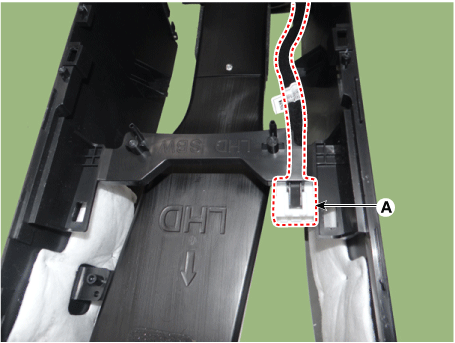
Disconnect the console lower side extension wiring mounting clip (A).
|
| 5. |
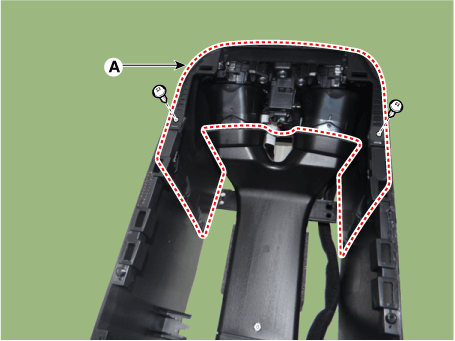
Remove the console rear cover (A) after loosening the mounting screws.
|
| 6. |
Install in the reverse order of removal.
|
 Console Armrest
Components and components location
Component Location
1. Front console armrest
Repair procedures
Replacement
...
 Front Bumper
Components and components location
Components
1. Front bumper cover assembly
2. Front bumper mounting bracket
3. Front bumper side bracket
...
Other information:
Kia Stinger CK 2018-2025 Service Manual: Low Pressure Fuel Pump
Repair procedures Inspection [Fuel sender] 1. Switch "OFF" the ignition and disconnect the negative (-) battery terminal. 2. Remove the fuel pump assembly. 3. Using an ohmmeter, measure the resistance between term ...
Kia Stinger CK 2018-2025 Service Manual: Battery
Repair procedures Inspection Battery Voltage and Status Check the battery voltage and status using the battery tester. Battery Terminal 1. Move back and forth to check if the battery terminals (A) are loose or corroded. If the terminals are corroded, clean the ...
Copyright © www.kstinger.com 2015-2025


