Kia Stinger CK: Interior Trim / Luggage Side Trim
Components and components location
| Component Location |
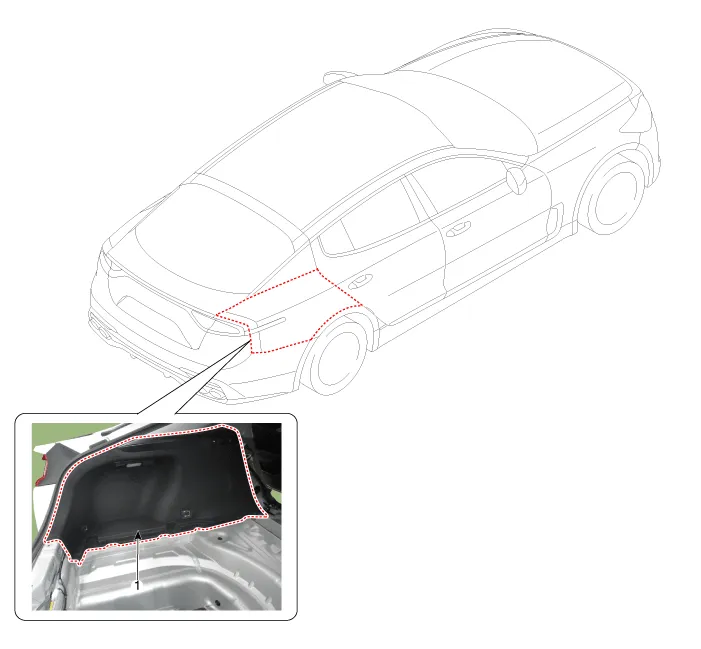
| 1. Rear transverse trim |
Repair procedures
| Replacement |
Put on gloves to protect your hands. |

|

| 1. |
Remove the rear seat assembly. (Refer to Rear Seat - "Rear Seat Assembly") |
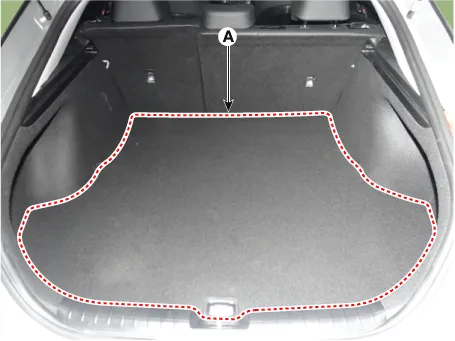
| 2. |
Remove the luggage covering mat(A).
|
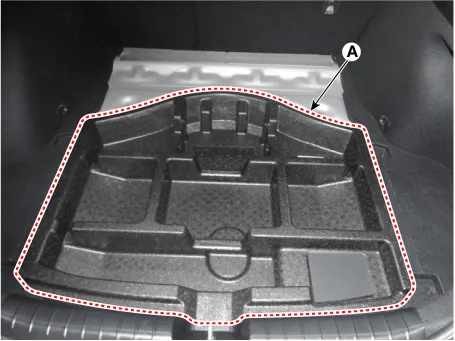
| 3. |
Remove the center tray (A).
|
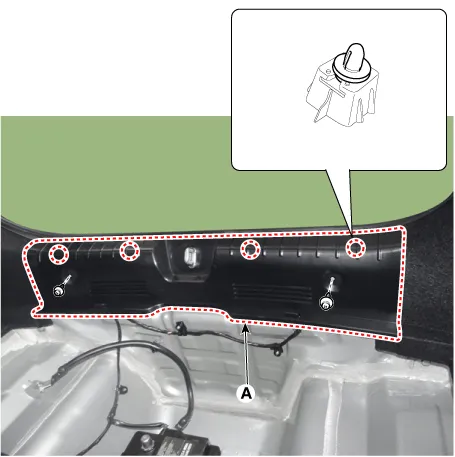
| 4. |
Remove the rear transverse trim (A).
|
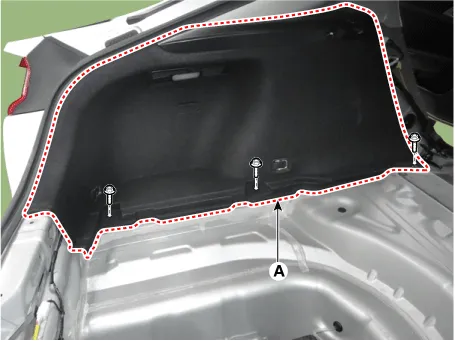
| 5. |
Separate the luggage side trim (A) after loosening the mounting screws.
|
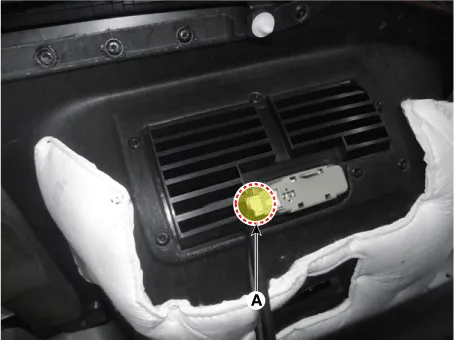
| 6. |
Remove the luggage side trim after disconnecting the luggage lamp connector (A).
|
| 7. |
Install in the reverse order of removal.
|


Other information:
Kia Stinger (CK) 2018-2023 Service Manual: Warning type
If the vehicle detected by sensors approaches your vehicle, the warning chime will sound and the warning light will blink on the outside rearview mirror. If the detected vehicle is out of detection range, moving away in the opposite direction or moving slow, or if the vehicle is right behind your vehicle, if the direction of the other vehicle is not heading towards your vehicle, the warning is cancelled.Kia Stinger (CK) 2018-2023 Service Manual: Crankcase Emission Control System
Schematic diagrams Schematic Diagram Repair procedures Inspection 1. After disconnecting the vapor hose from the PCV valve, remove the PCV valve. 2. Reconnect the PCV valve to the vapor hose. 3. Run the engine at idle, then put a finger over the open end of the PCV valve and make sure that intake manifold vacuum can be felt.Categories
- Manuals Home
- Kia Stinger Owners Manual
- Kia Stinger Service Manual
- New on site
- Most important about car
