Kia Stinger CK: Hydraulic System / P Position Solenoid Valve (ON/OFF)
Specifications
| Specifications |
|
Item |
Specification |
|
Control type |
ON/OFF |
|
Control pressure kpa (kgf/cm², psi) |
539.36 (5.5, 78.23) |
|
Current (mA) |
0 - 600 |
|
Coil resistance (Ω) |
10.5 ± 0.5 |
Components and components location
| Components Location |
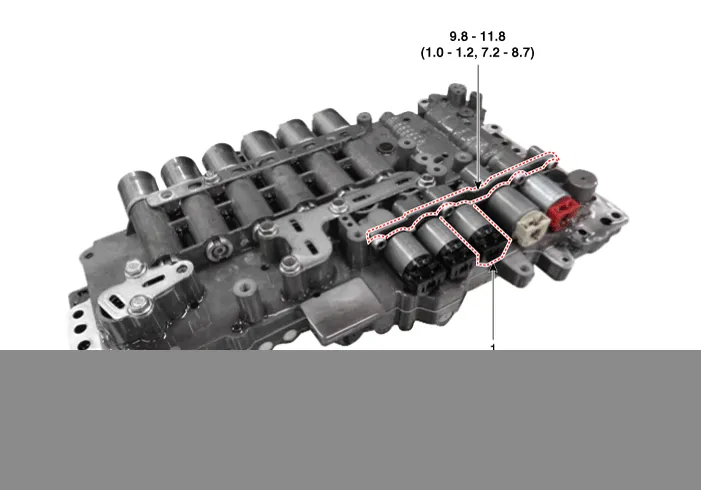
| 1. P position solenoid valve
|
2. Solenoid valve support bracket
|
Description and operation
| Description |
| • |
P position solenoid valve is ON/OFF type. |
| • |
When TCM supplies current to solenoid valve, the solenoid valve operates and controls the P range. |

Solenoid Valve Operation Table
|
|
ON/OFF |
|
(P) |
|
|
P |
|
|
N |
● |
|
1 |
● |
|
2 |
● |
|
3 |
● |
|
4 |
● |
|
5 |
● |
|
6 |
● |
|
7 |
● |
|
8 |
● |
|
REV |
● |
Schematic diagrams
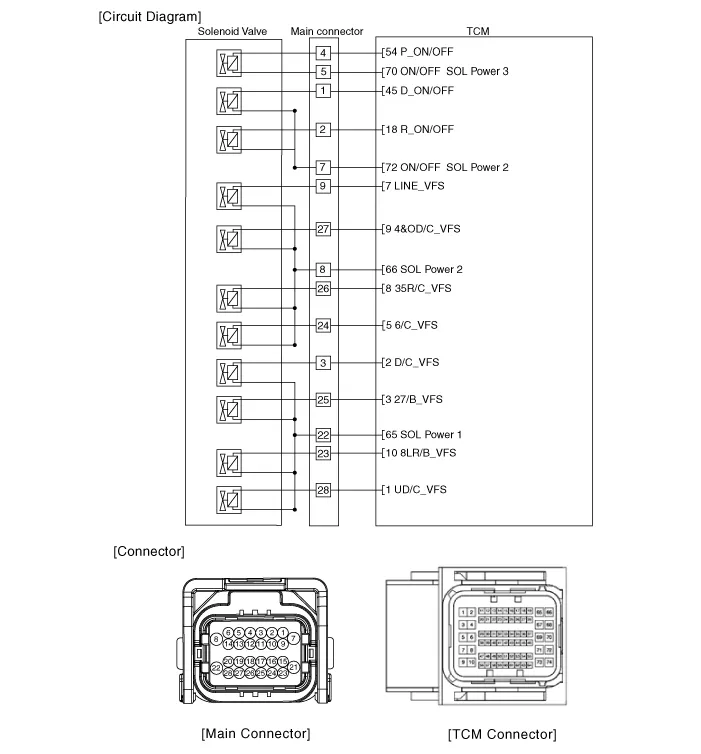
| Circuit Diagram |
Repair procedures
| Inspection |
| 1. |
Switch "OFF" ignition |
| 2. |
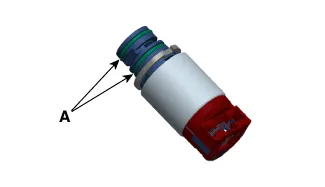
Disconnect the main connector (A).
|

| 3. |
Measure the resistance between power terminal (5) and signal terminal (4).
|
| Removal |
|

| 1. |
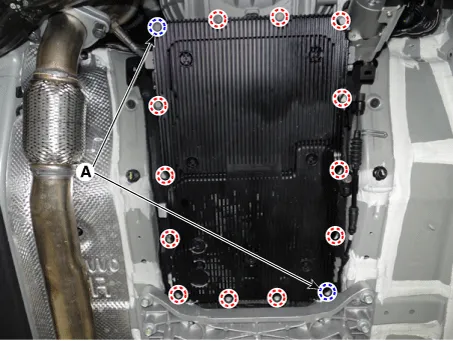
Remove the under cover. (Refer to Engine Mechanical System - "Engine Room Under Cover"). |
| 2. |
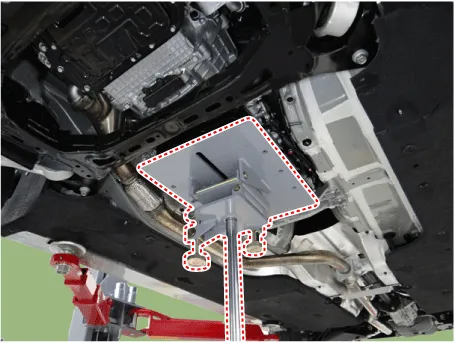
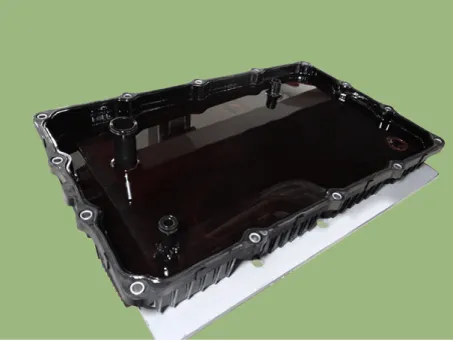
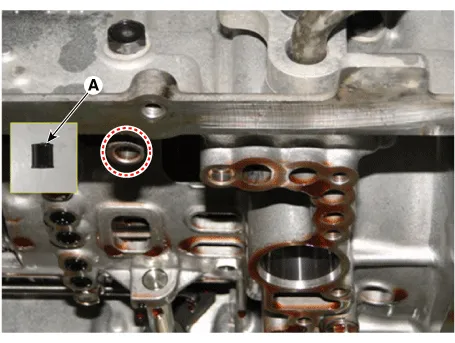
Remove the ATF drain plug (A), allow the fluid to drain out and then reinstall the drain plug.
|


| 3. |
Disconnect the main connector (A).
|
| 4. |
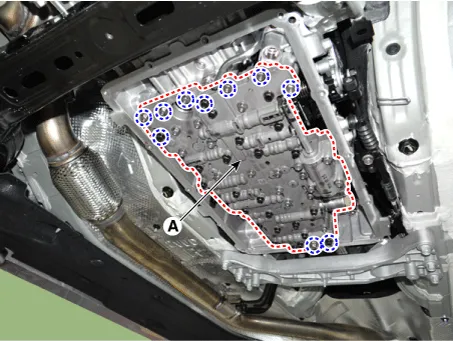
Remove the valve body cover.
|
| 5. |
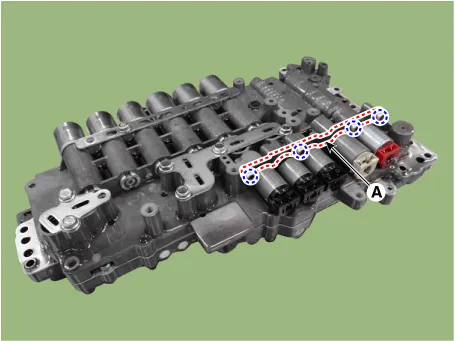
Remove the valve body assembly (A) after loosening the bolts.
|
| 6. |
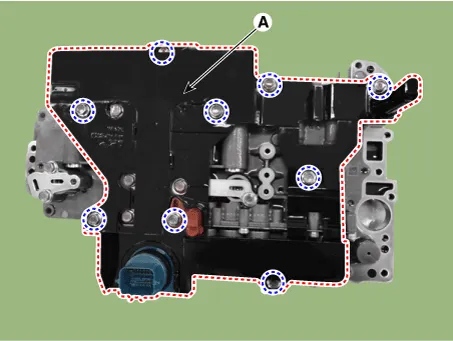
Remove the E-module (A) after loosening the bolts.
|
| 7. |
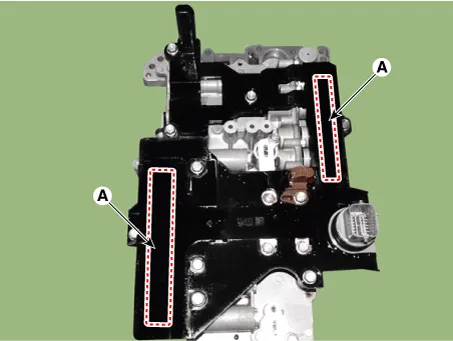
Remove the solenoid valve support bracket (A).
|
| 8. |
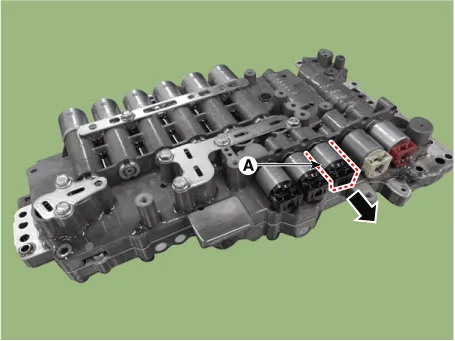
Remove the P position solenoid valve (A).
|
| Installation |
| 1. |
Install in the reverse order of removal.
|
| 2. |
Perform the procedures below after installing.
|


Other information:
Kia Stinger (CK) 2018-2023 Service Manual: Seat Heater Switch
Components and components location Components Front Seat Switch 1. Driver side seat heater switch 2. Passenger side seat heater switch Rear Seat Switch 1. Rear seat heater switch (LH/RH) Description and operation Description Heater Seat Smart Control Technology • To prevent low temperature burn, seat heater temperature will automatically be lowered after a certain period of time.Kia Stinger (CK) 2018-2023 Service Manual: The Eco-coasting system
When certain conditions are met, the engine is automatically decoupled from the transmission while the shift lever is remained in D (Drive). In this ECO Coasting mode, the engine stays at idling speed to reduce fuel consumption and increase coasting distance. The engine is automatically coupled back again when ECO Coasting deactivation conditions are met.Categories
- Manuals Home
- Kia Stinger Owners Manual
- Kia Stinger Service Manual
- New on site
- Most important about car
