Kia Stinger CK: Rear Door / Rear Door Window Glass
Components and components location
| Component Location |
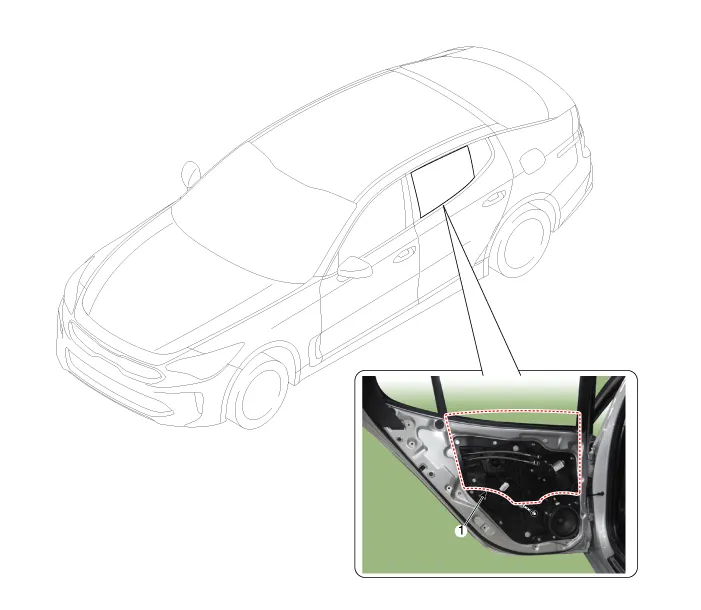
| 1. Rear door window glass |
Repair procedures
| Replacement |
Put on gloves to protect your hands. |

|

| 1. |
Remove the rear door trim. (Refer to Rear Door - "Rear Door Trim") |
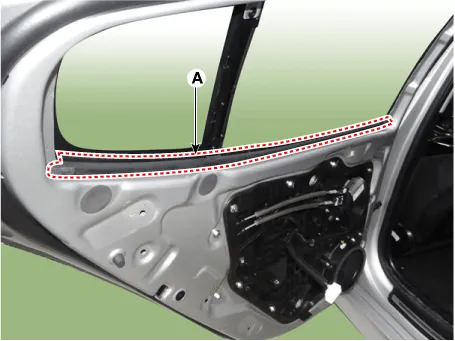
| 2. |
Remove the rear door frame inner cover (A) by using a remover.
|

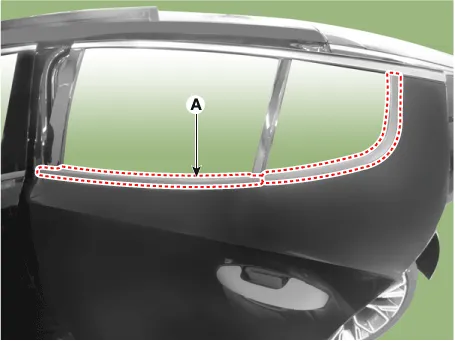
| 3. |
Remove the rear door belt inside weatherstrip (A).
|
| 4. |
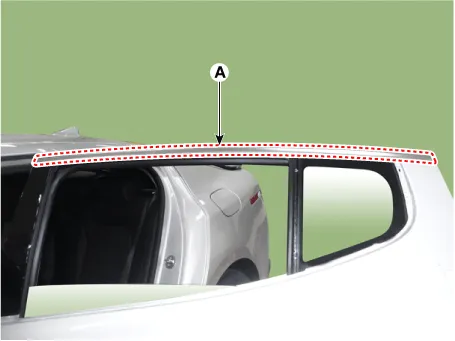
Remove the rear door belt outside weatherstrip (A) by using a remover.
|
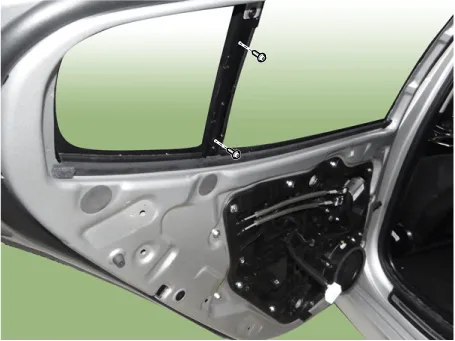
| 5. |
Remove the rear door drive channel (A) after loosening the mounting screws.
|
| 6. |
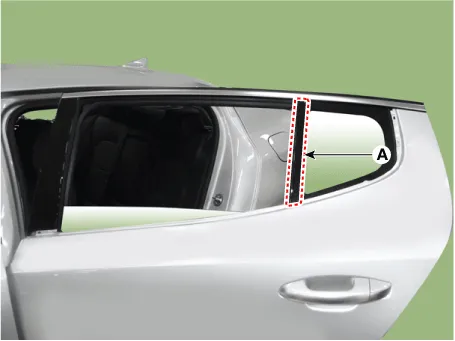
Remove the rear door frame molding (A) by using a remover.
|
| 7. |
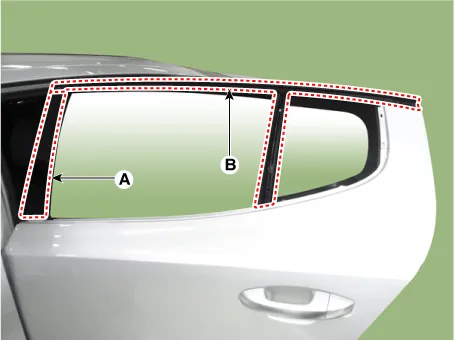
Remove the rear door frame garnish (A) and glass run.
|
| 8. |
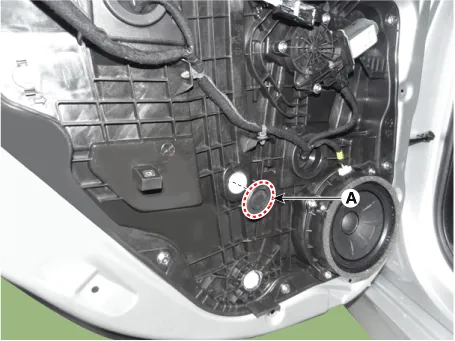
Remove the rear door window glass mounting hole plug (A).
|
| 9. |
Loosen the mounting bolt, and pull out the rear door window glass (B) by tilting it sideways.
|

| 10. |
Install in the reverse order of removal.
|


Other information:
Kia Stinger (CK) 2018-2023 Service Manual: Steering Gear Rack, Linkage and Boots
Repair procedures Inspection 1. Check the steering wheel free road. (1) Turn the steering wheel so that the front wheels are facing straight ahead. (2) Measure the distance where the steering wheel can be turned without moving the front wheels.Kia Stinger (CK) 2018-2023 Service Manual: Integrated Body Control Unit (IBU)
Specifications Specifications Items Specifications Rated voltage DC 12 V Operating voltage DC 9 - 16 V Operating temperature -40 - 176°F (-40 - 80°C) Dark current Max. 4.0 mA Components and components location Components Connector Pin Information No.Categories
- Manuals Home
- Kia Stinger Owners Manual
- Kia Stinger Service Manual
- New on site
- Most important about car
