
Kia Stinger CK: Wide Sunroof / Wide Sunroof Assembly
Components and components location
| Components Location |
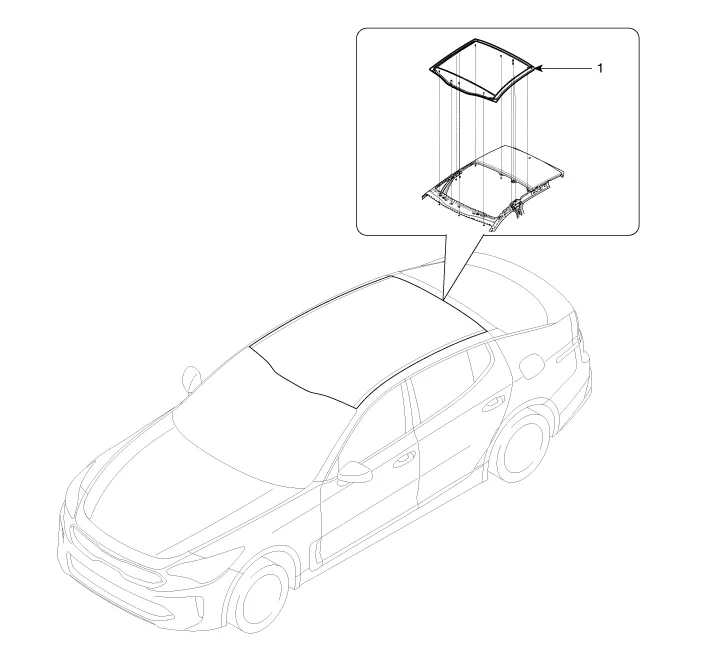
| 1. Wide sunroof assembly |
Repair procedures
| Removal |
|

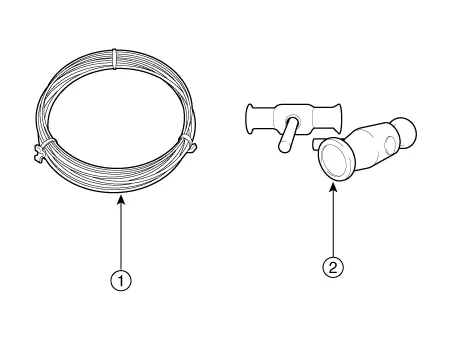
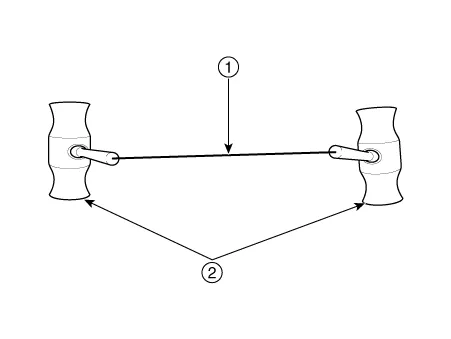
| 1. |
Remove the moving glass. (Refer to Wide Sunroof - "Moving Glass") |
| 2. |
Remove the roof side molding. (Refer to Body Side Molding - "Roof Side Molding") |
| 3. |
Remove the roof trim. (Refer to Roof Trim - "Roof Trim Assembly") |
| 4. |
Remove the curtain airbag (CAB) module. (Refer to Restraint - "Curtain Airbag (CAB) Module") |
| 5. |
Remove the assist handle bracket (A) after loosening the mounting bolts.
|

| 6. |
Fix the windshield glass upper molding (A) as below figure.
|

| 7. |
Pull the square wire (A) to the left and right, then apply a force in the direction of the arrow to cut off the residual sealant.
|


| 8. |
Remove the front glass (A) carefully without damaging it.
|
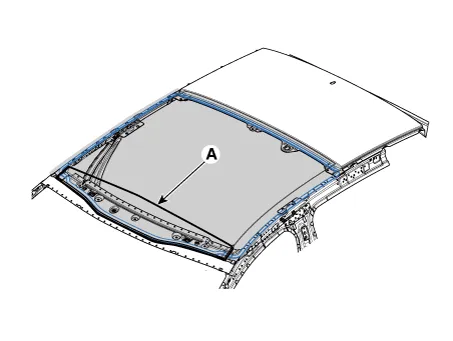
| 9. |
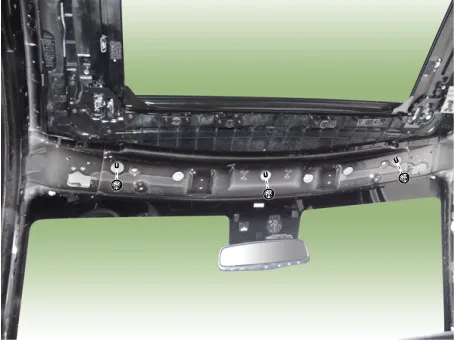
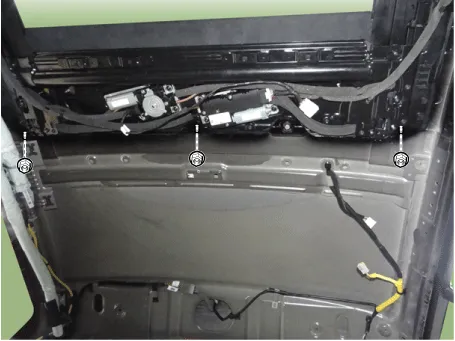
Loosen the panorama sunroof mounting nuts (A). [Front]
[Rear]
|
| 10. |
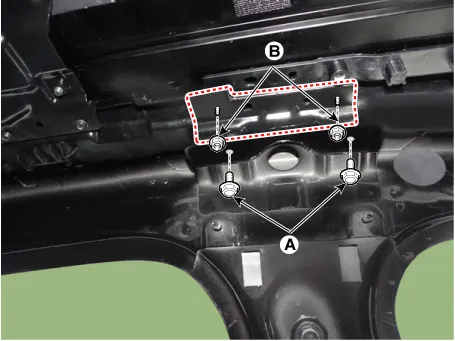
Loosen the bolts (A) and nuts (B) on the side of the panorama sunroof.
|
| 11. |
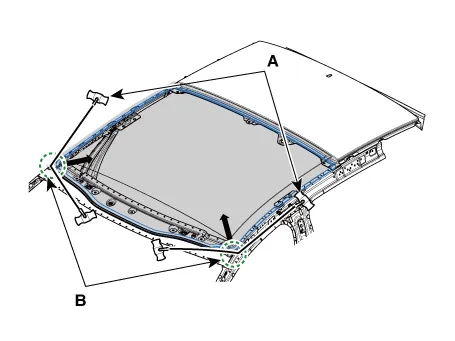
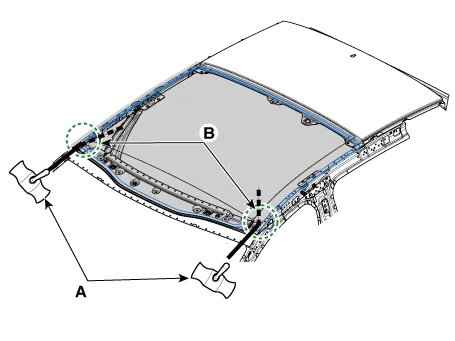
Pull the square wire (A) to the left and right, then apply a force in the direction of the arrow to cut off the residual sealant on front edge (B).
|
| 12. |
Push wire (A) from the outside of the body toward the face of edge (B) in the direction of the arrow.
|
| 13. |
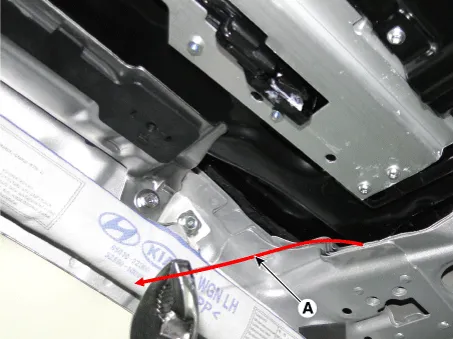
Pull the wire lead (A) inward when it is visible inside the body.
|
| 14. |
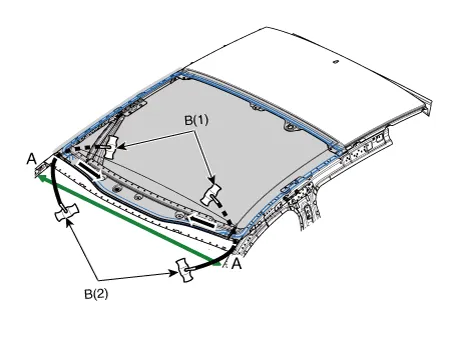
Pull the square wire (B) to the left and right, then apply a force in the direction of the arrow to cut off the residual sealant on front section (A-A).
|

| 15. |
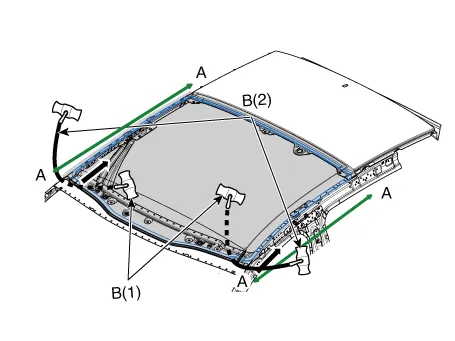
Pull the square wire (B) to the left and right, then apply a force in the direction of the arrow to cut off the residual sealant on side section (A-A).
|
| 16. |
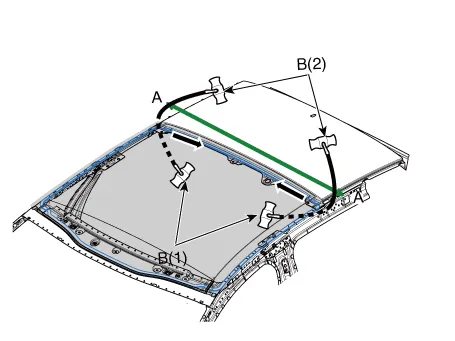
Pull the square wire (B) to the left and right, then apply a force in the direction of the arrow to cut off the residual sealant on rear section (A-A).
|

| 17. |
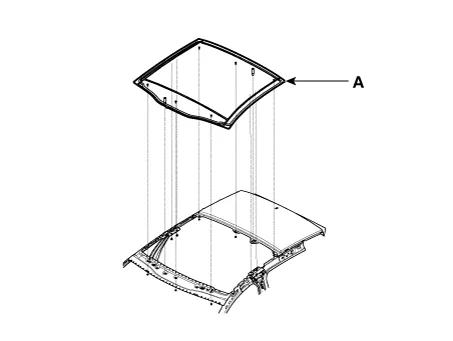
Cut residual sealant on every surface, and then remove panorama sunroof assembly (A).
|
| Installation |
|
| 1. |
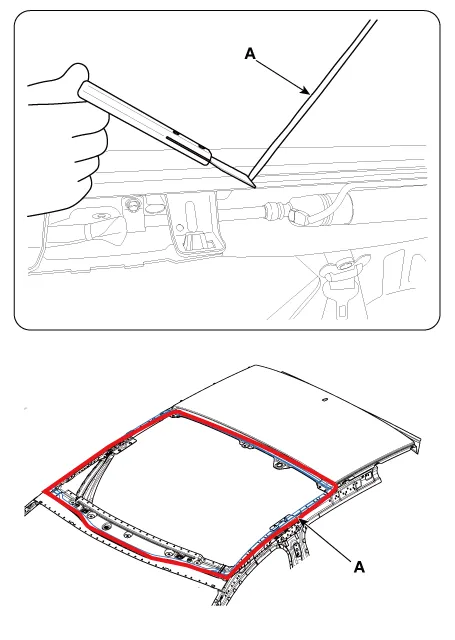
Use a blade to cut off residual sealant (A) around body panel.
|
| 2. |
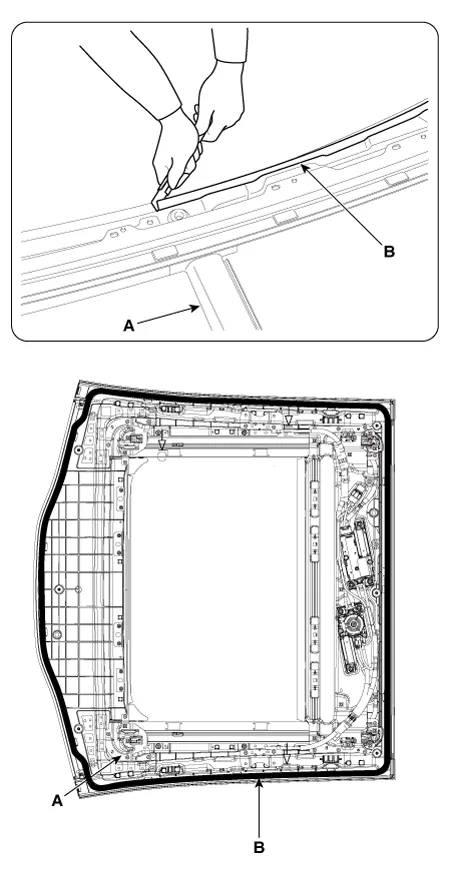
If panorama sunroof assembly (A) is reused, use a blade to remove residual sealant (B) around the body panel.
|
| 3. |
Use alcohol or an air gun to clean up the edges of the body panel and the panorama sunroof. |
| 4. |
Use a sealant gun to apply sealant (B) around body panel (A).
|

| 5. |
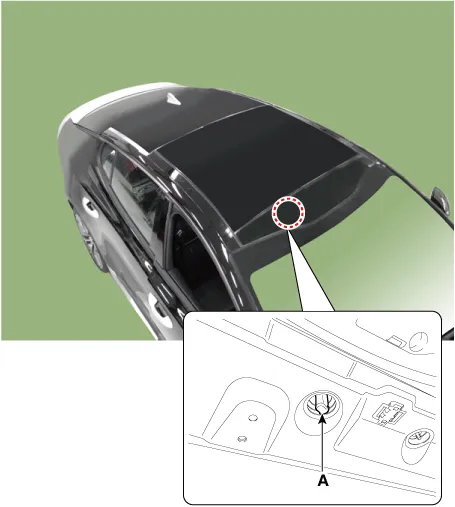
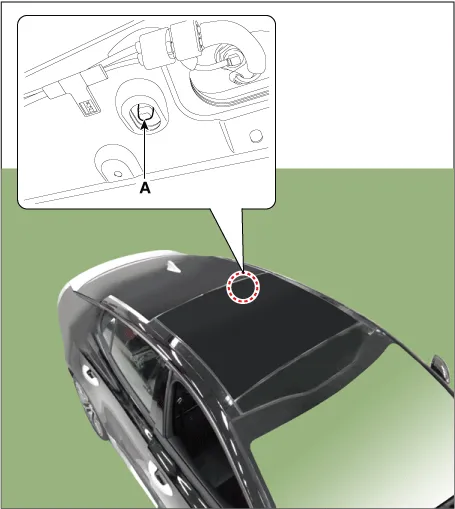
Align with centering device hole (A) of the body, and carefully mount the panorama sunroof on the body panel. [Front]
[Rear]
|
| 6. |
Check step and gap before fully mounting panorama sunroof assembly (A). |
| 7. |
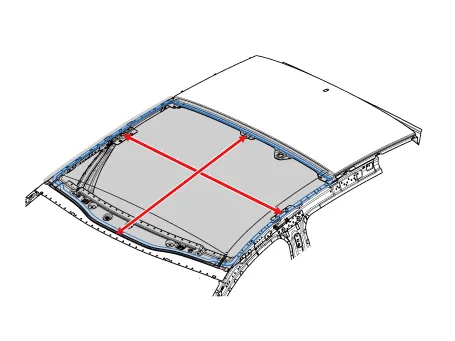
Apply tape around the panorama sunroof assembly to prevent the assembly from coming off.
|
| 8. |
Tighten panorama sunroof mounting nuts (A). [Front]
[Rear]
|
| 9. |
Tighten panorama sunroof side mounting bolts (A) and nuts (B).
|
| 10. |
Install the assist handle bracket (A).
|
| 11. |
Install the moving glass. (Refer to Wide Sunroof - "Moving Glass") |
| 12. |
Press wide sunroof switch to fully close the movable glass. |
| 13. |
Perform water leak test.
|
| 14. |
In case of water leakage, apply sealant to the whole area of leakage.
|
| 15. |
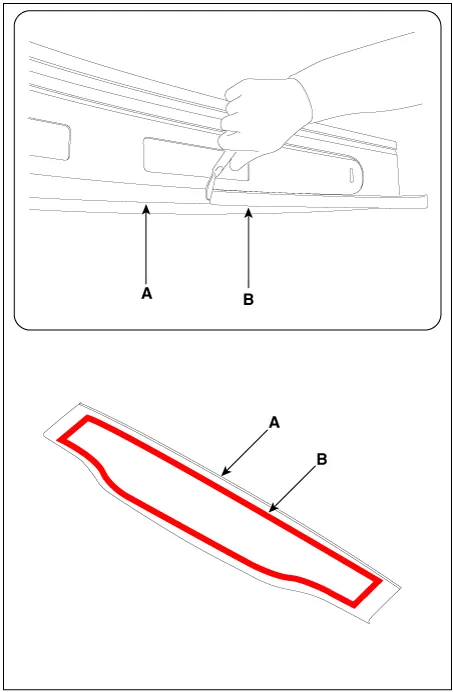
If front glass (A) is reused, use a blade to remove residual sealant (B) around the body panel.
|
| 16. |
Use alcohol or an air gun to clean up the edges of the body panel and front glass. |
| 17. |
Use a sealant gun to apply sealant (B) around body panel (A).
|

| 18. |
Install the front glass (A) loosely on the body panel.
|

| 19. |
Check step and gap before front glass (A) is fully mounted. |
| 20. |
Apply tape around the front glass to prevent the glass from coming off.
|
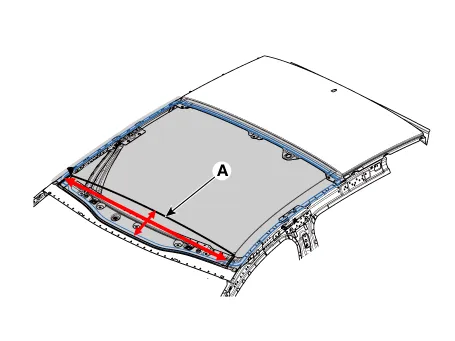
| 21. |
Install the curtain airbag (CAB) module. (Refer to Restraint - "Curtain Airbag (CAB) Module") |
| 22. |
Remove the roof side molding. (Refer to Body Side Molding - "Roof Side Molding") |
| 23. |
Remove the roof trim. (Refer to Roof Trim - "Roof Trim Assembly")
|


Other information:
Components and components location Components Location 1. Mechanism Rail Repair procedures Replacement Put on gloves to protect your hands. • Use a plastic panel removal tool to remove interior trim pieces without marring the surface.Specifications Specifications Item Specification Output type PWM Power supply (V) 5 Components and components location Components Location 1. Inhibitor switch 2. Manual control lever Schematic diagrams Circuit Diagram Repair procedures Inspection Inspect the connector thoroughly for looseness, poor connection, bending, corrosion, contamination, deformation, or damage.Categories
- Manuals Home
- Kia Stinger Owners Manual
- Kia Stinger Service Manual
- New on site
- Most important about car
