
Kia Stinger CK: Automatic Transmission Control System / Speed Sensor
Specifications
| Specifications |
|
Item |
Specification |
|
Type |
Hall effect sensor |
|
Operating condition (°C)°F |
(-40 to 150)-40 to 302 |
|
Output voltage (V) |
High :1.4 |
|
Low : 0.7 |
Components and components location
| Components |
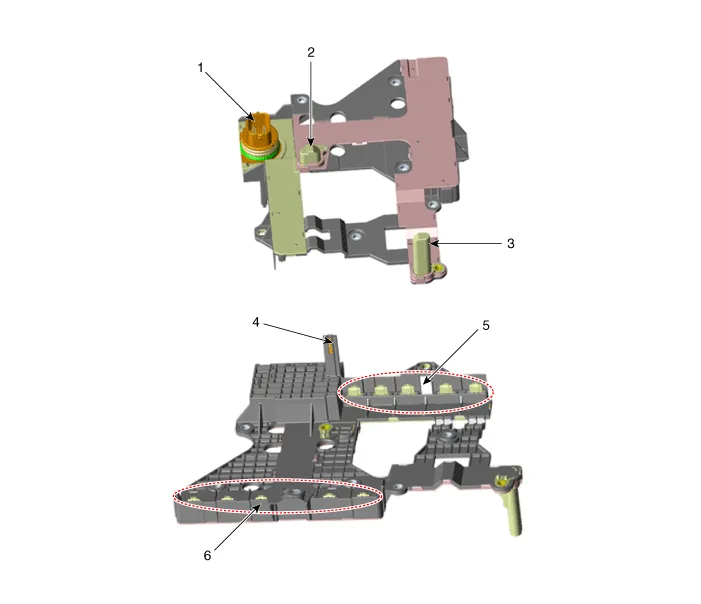
| 1. E module connector 2. Output speed sensor 3. Input speed sensor |
4. Oil temperature sensor 5. Indirect control solenoid valve connector 6. Direct control solenoid valve connector |
Description and operation
| Description |
| • |
Speed sensor is integrated with E module. |
| • |
Speed sensor uses an electric current type hall sensor in which the current is changed |
| • |
The speed sensor measures the rate of rotation of the input & output shafts inside the transmission and delivers the readings to the TCM. |
| • |
The sensor provides critical input data used in feedback control, torque converter clutch control, gear setting control, line pressure control, clutch activation pressure control, and sensor fault analysis. |
Schematic diagrams
| Circuit Diagram |
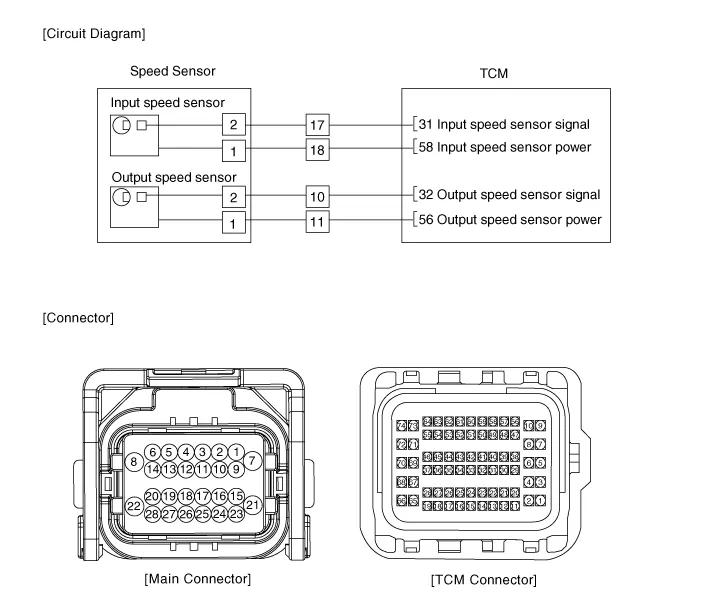
Repair procedures
| Inspection |
| 1. |
Check signal waveform of speed sensor using the KDS. |
| Replacement |
The speed sensor is integrated into the E-module that can’t be disassembled. So refer to “E-module” for the removal or installation procedure of the speed sensor. |

| 1. |
Replace the E-module. (Refer to Automatic Transmission Control System - "E-Module") |


Other information:
Kia Stinger (CK) 2018-2023 Service Manual: Automatic climate control system
■ Front seat ■ Rear seat 1. Driver’s temperature control knob 2. AUTO (automatic control) button 3. Front windshield defroster button 4. Rear window/mirrors defroster button 5. Air conditioning button 6. Air intake control buttons 7. OFF button 8. Fan speed control buttons 9. Mode selection button 10. Passenger's temperature control knob 11.Components and components location Components Location Description and operation Description Due to the considerably more frequent occurrence of starting operations, the electrical load that occurs often leads to voltage dips in the vehicle network.In order to stabilize the power supply for certain voltage-sensitive electrical components, a DC/DC converter is used in conjunction with the ISG function.Categories
- Manuals Home
- Kia Stinger Owners Manual
- Kia Stinger Service Manual
- New on site
- Most important about car
