Kia Stinger CK: Automatic Transmission Control System / Parking Release Actuator (Parking Release Cable)
Components and components location
| Components |

| 1. E-Shifter 2. Parking release actuator |
3. Parking release cable 4. Parking release lever |
Schematic diagrams
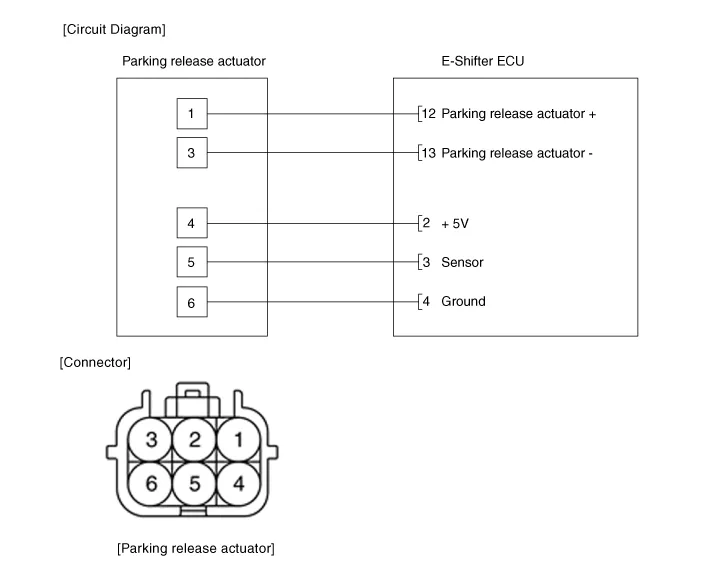
| Circuit Diagram |
Repair procedures
| Removal |
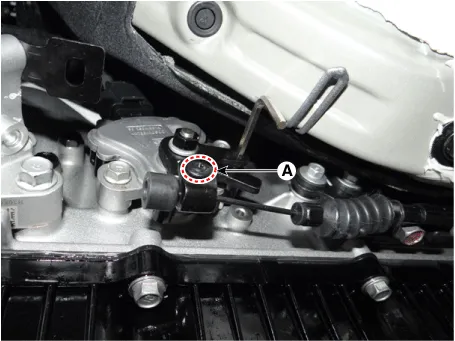
| 1. |
Remove the parking release cable after loosening the fastener (A).
|

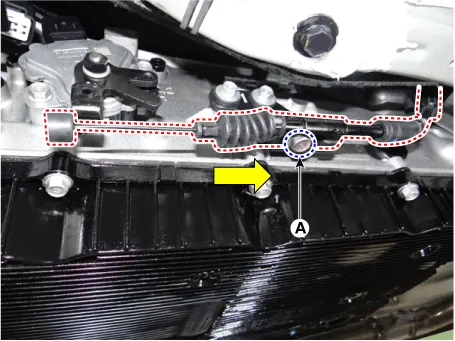
| 2. |
Remove the parking release cable from the bracket after loosening a bolt (A).
|
| 3. |
Remove the floor console assembly. (Refer to Body - “Floor Console Assembly”) |
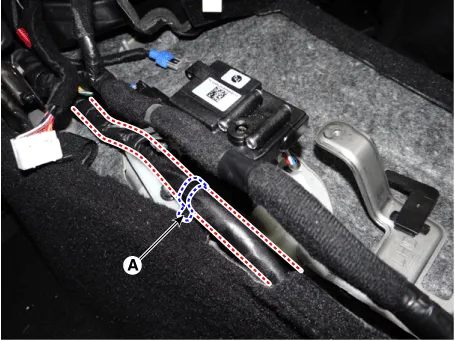
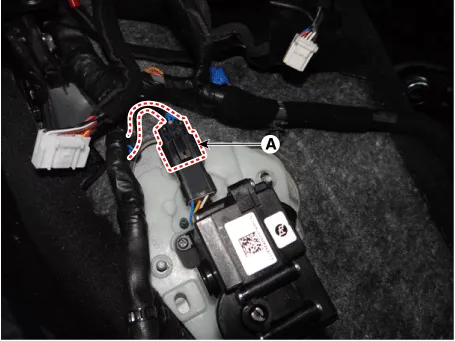
| 4. |
Remove the wiring fixing clip (A) from the parking release actuator.
|
| 5. |
Loosen the parking release actuator mounting nuts (A, B).
|
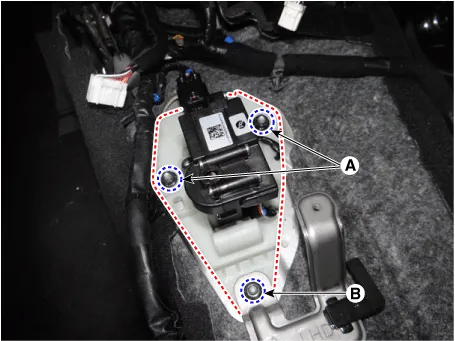
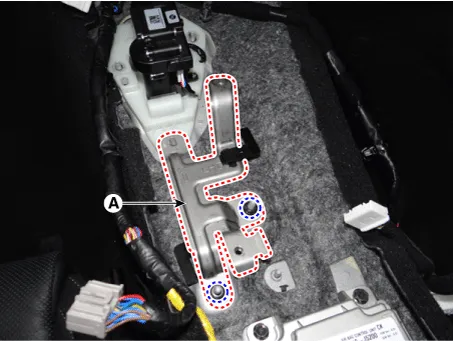
| 6. |
Remove the bracket (A).
|
| 7. |
Disconnect the parking release actuator connector (A). Then, remove the cable by pulling it toward the vehicle interior.
|
| Installation |
| 1. |
Install in the reverse order of removal. |


Other information:
Kia Stinger (CK) 2018-2023 Service Manual: Fuel Pressure Control Valve (FPCV)
Specifications Specification Item Specification Coil Resistance (Ω) 0.47 - 0.53 [20°C(68°F)] Description and operation Description Installed on the high pressure fuel pump, the Fuel Pressure Control Valve controls flow of fuel into the injectors in accordance with the ECM signal calculated based on various engine conditions.Kia Stinger (CK) 2018-2023 Service Manual: Parking Distance Warning (PDW) Sensor
Components and components location Components Repair procedures Removal Parking Distance Warning-Forward (PDW-F) Sensor 1. Disconnect the negative (-) battery terminal. 2. Remove the front bumper assembly. (Refer to Body - "Front Bumper Assembly") 3.Categories
- Manuals Home
- Kia Stinger Owners Manual
- Kia Stinger Service Manual
- New on site
- Most important about car
