Kia Stinger CK: Hood / Hood Latch
Components and components location
| Component Location |
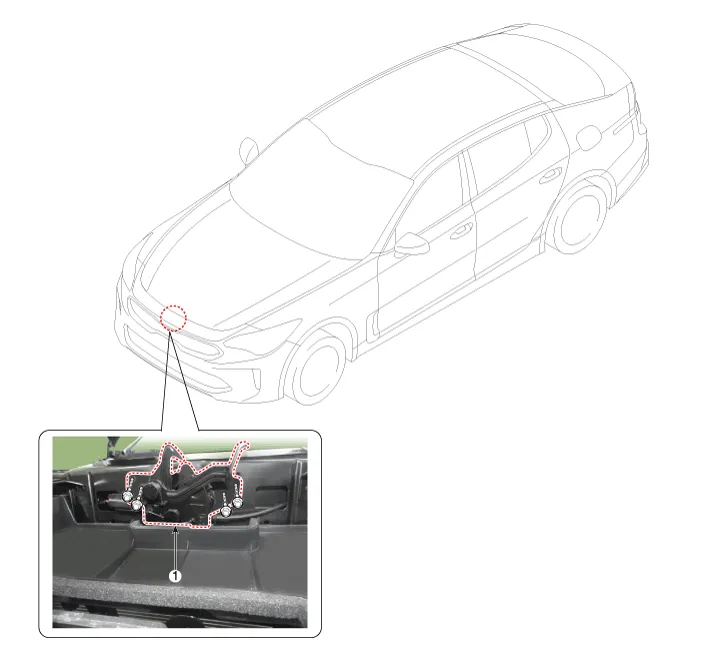
| 1. Hood latch assembly |
Repair procedures
| Replacement |
| 1. |
Remove the front bumper. (Refer to Front bumper - "Front bumper Assembly") |
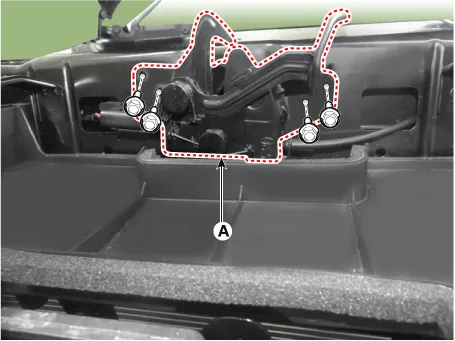
| 2. |
Remove the hood latch assembly (A) after loosening the mounting screw.
|
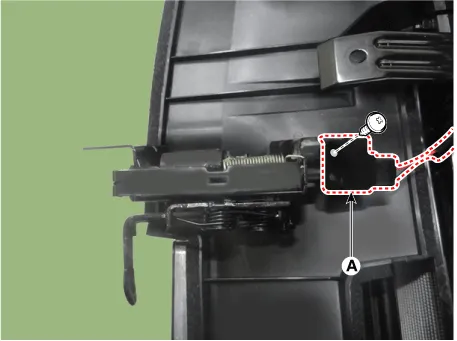
| 3. |
Disconnect the hood latch cable (A).
|

| 4. |
Disconnect the hood latch connector (A) after loosening the mounting screw.
|
| 5. |
Install in the reverse order of removal.
|


Other information:
Kia Stinger (CK) 2018-2023 Service Manual: Seat Ventilation Unit
Components and components location Component Location 1. Seat ventilation blower 2. Seat ventilation unit (Assist seat only) Schematic diagrams Circuit Diagram Repair procedures Removal Seat Ventilation Unit 1. Disconnect the negative (-) battery terminal.Repair procedures Removal 1. Remove wheel nuts, wheel and tire (A) from hub. Tightening torque: 107.9 - 127.5 N·m (11.0 - 13.0 kgf·m, 79.6 - 94.0 lb·ft) Be careful not to damage the wheel bolts when removing the wheel and tire (A).Categories
- Manuals Home
- Kia Stinger Owners Manual
- Kia Stinger Service Manual
- New on site
- Most important about car

Copyright © 2026 www.kstinger.com 0.0086