Kia Stinger CK: Front Seat Belt / Hood
Contents:
- Hood Assembly
- Hood Seal Weatherstrip
- Hood Lifter
- Hood Weatherstrip
- Hood Insulator Pad
- Hood Latch Release Handle
- Hood Latch
Repair procedures
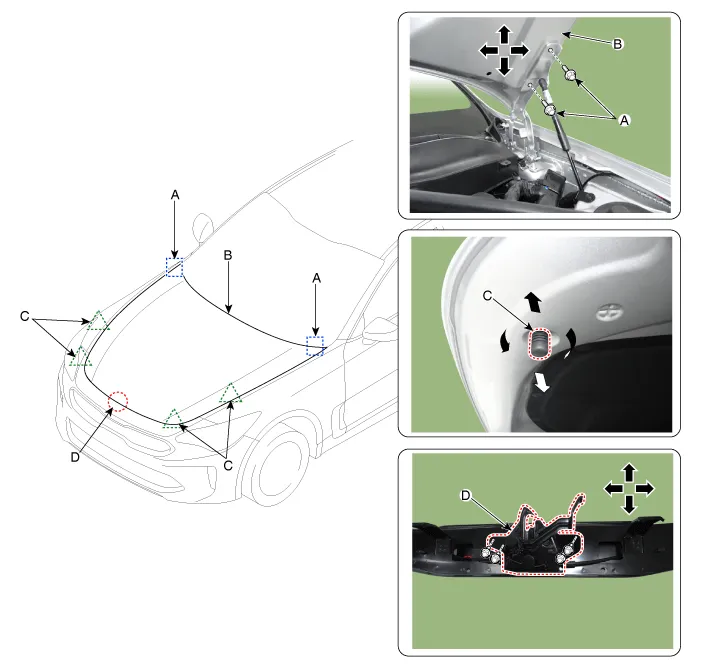
| Adjustment |
| 1. |
After loosening the hinge (A) mounting bolt, adjust the hood (B) by moving it up and down, or right and left. |
| 2. |
Adjust the hood height by turning the hood overslam bumpers (C). |
| 3. |
After loosening the hood latch (D) mounting bolts, adjust the latch by moving it up and down, or right and left.
|
Hood Assembly ➤
Hood Seal Weatherstrip
Repair procedures
| Replacement |
| 1. |
Detach the clip and then remove the hood seal weatherstrip (A).
|

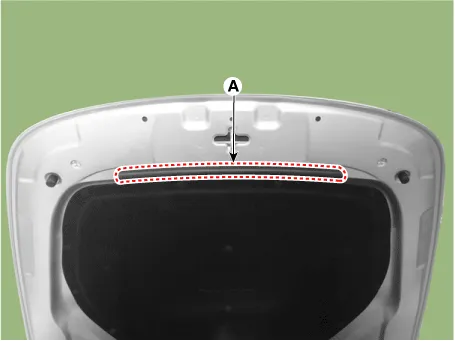
| 2. |
Install in the reverse order of removal. |
Hood Lifter ➤
Hood Weatherstrip
Repair procedures
| Replacement |
| 1. |
Detach the clip and then remove the hood weatherstrip (A).
|
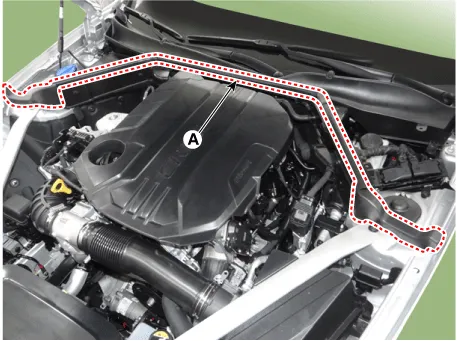
| 2. |
Install in the reverse order of removal. |
Hood Insulator Pad
Repair procedures
| Replacement |
| 1. |
Using a clip remover, detach the clips, and remove the hood insulator pad (A).
|
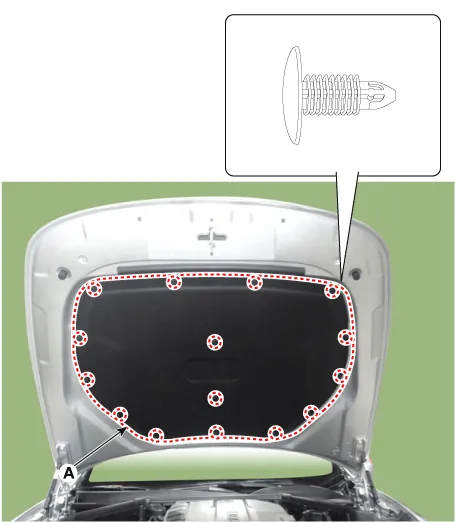
| 2. |
Install in the reverse order of removal.
|

Hood Latch Release Handle ➤
Hood Latch ➤


Other information:
Kia Stinger (CK) 2018-2023 Service Manual: Ambient Temperature Sensor (ATS)
Specifications Specification Temperature[⁰C(⁰F)] Resistance(kΩ) -40(-40) 811.1 - 956.8 -20(-4) 255.6 - 287.7 0(32) 91.5 - 98.8 20(68) 36.6 - 38.0 30(86) 23.Kia Stinger (CK) 2018-2023 Service Manual: Emergency Signal System
Description and operation Description Introduction of quick brake warning system (ESS) In case of quick brake by driver, the brake lamp or turn signal is blinked to warn against the vehicle at rear. 1. Basic function (Blinking the brake lamp/emergency lamp) – Operation condition: In case of quick brake or operation of ABS above in a certain speed – Releasing condition: In case of stopping the quick brake or releasing the ABS operation 2.Categories
- Manuals Home
- Kia Stinger Owners Manual
- Kia Stinger Service Manual
- Hood Assembly
- Hood Seal Weatherstrip
- Hood Lifter
- Hood Weatherstrip
- Hood Insulator Pad
- Hood Latch Release Handle
- Hood Latch
- New on site
- Most important about car
Contents
