Kia Stinger CK: Interior Trim / Rear Pillar Trim
Components and components location
| Component Location |

| 1. Rear pillar trim |
Repair procedures
| Replacement |
Put on gloves to protect your hands. |

|

| 1. |
Remove the rear seat assembly. (Refer to Rear Seat - "Rear Seat Assembly") |
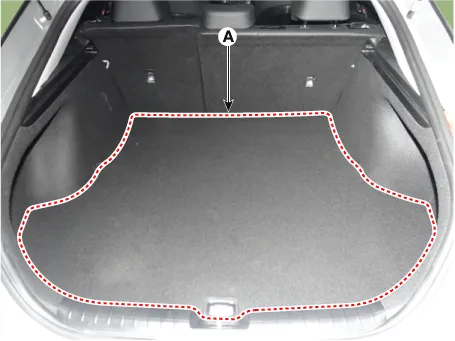
| 2. |
Remove the luggage covering mat(A).
|
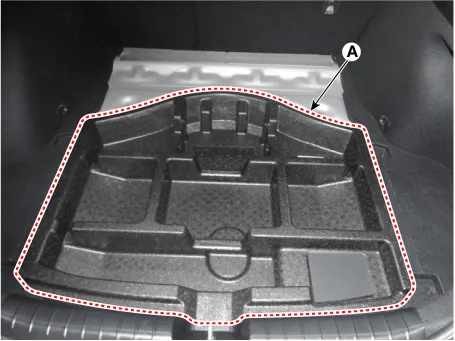
| 3. |
Remove the center tray (A).
|
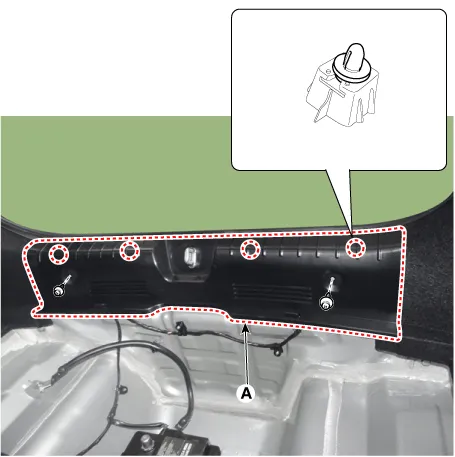
| 4. |
Remove the rear transverse trim (A).
|
| 5. |
Separate the luggage side trim (A) after loosening the mounting screws.
|
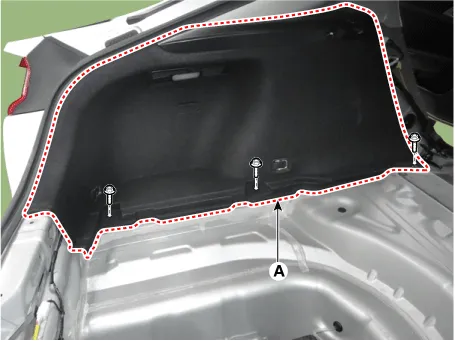
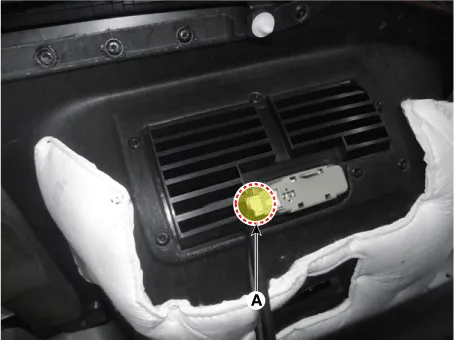
| 6. |
Remove the luggage side trim after disconnecting the luggage lamp connector (A).
|
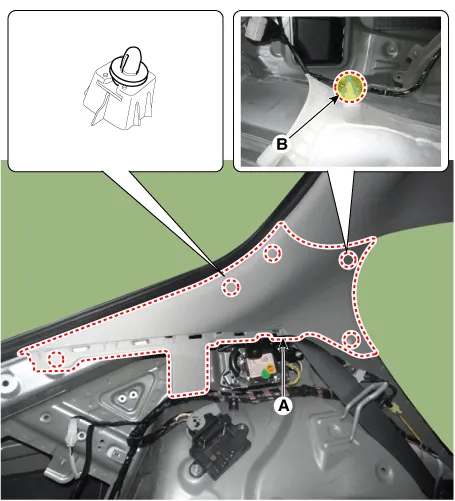
| 7. |
Remove the rear pillar trim (A).
|
| 8. |
Install in the reverse order of removal.
|


Other information:
Kia Stinger (CK) 2018-2023 Service Manual: Drive Belt
Repair procedures Removal 1. Remove the engine room front under cover. (Refer to Engine and Transmission Assembly - "Engine Room Under Cover") 2. For release the tension, turn the drive belt tensioner (A) counterclockwise then remove the drive belt (B). 3.Kia Stinger (CK) 2018-2023 Service Manual: Occupant Detection System (ODS)
Your vehicle is equipped with an occupant detection system in the front passenger's seat. The occupant detection system is designed to detect the presence of a properly-seated front passenger and determine if the passenger's front air bag should be enabled (may inflate) or not. Only the front passenger front air bag is controlled by the Occupant Detection System.Categories
- Manuals Home
- Kia Stinger Owners Manual
- Kia Stinger Service Manual
- New on site
- Most important about car
