
Kia Stinger CK: Front Seat Belt / Hood
Contents:
- Hood Assembly
- Hood Seal Weatherstrip
- Hood Lifter
- Hood Weatherstrip
- Hood Insulator Pad
- Hood Latch Release Handle
- Hood Latch
Repair procedures
| Adjustment |
| 1. |
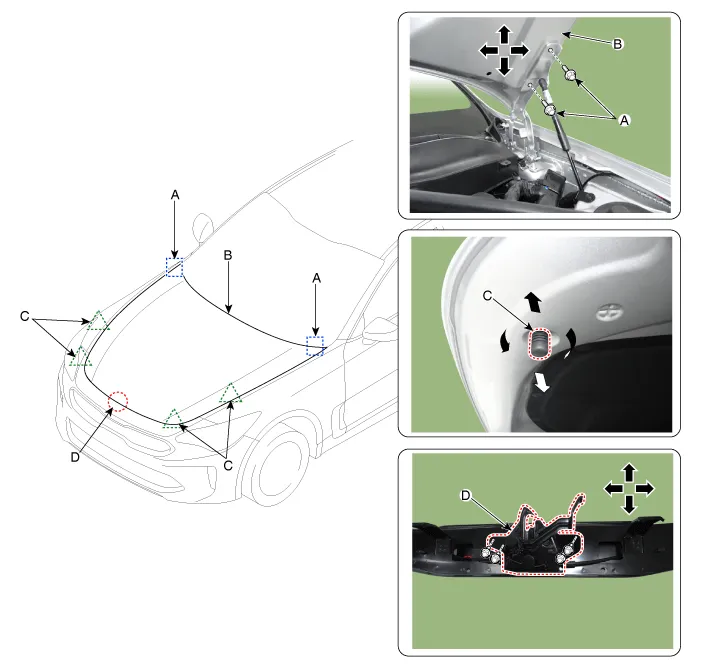
After loosening the hinge (A) mounting bolt, adjust the hood (B) by moving it up and down, or right and left. |
| 2. |
Adjust the hood height by turning the hood overslam bumpers (C). |
| 3. |
After loosening the hood latch (D) mounting bolts, adjust the latch by moving it up and down, or right and left.
|
Hood Assembly ➤
Hood Seal Weatherstrip
Repair procedures
| Replacement |
| 1. |
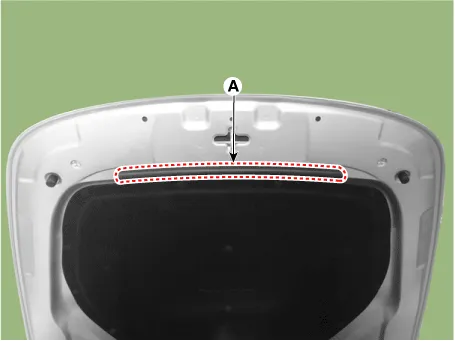
Detach the clip and then remove the hood seal weatherstrip (A).
|

| 2. |
Install in the reverse order of removal. |
Hood Lifter ➤
Hood Weatherstrip
Repair procedures
| Replacement |
| 1. |
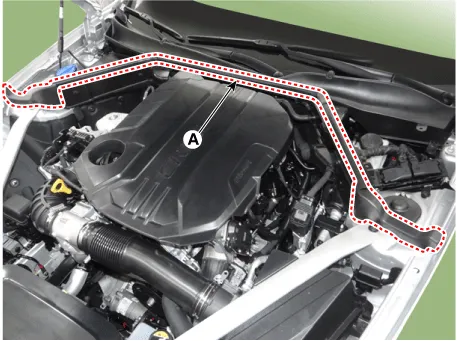
Detach the clip and then remove the hood weatherstrip (A).
|
| 2. |
Install in the reverse order of removal. |
Hood Insulator Pad
Repair procedures
| Replacement |
| 1. |
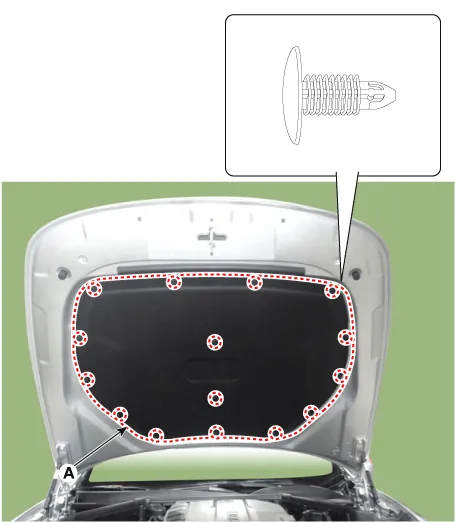
Using a clip remover, detach the clips, and remove the hood insulator pad (A).
|
| 2. |
Install in the reverse order of removal.
|

Hood Latch Release Handle ➤
Hood Latch ➤


Other information:
Repair procedures Service Adjustment Procedure Steering Wheel Play Inspection 1. Turn the steering wheel so that the front wheels are facing straight ahead. 2. Measure the distance that the steering wheel can be turned with out moving the front wheels. Standard value : 0 - 30mm (1.Specifications Specifications Items Specifications Model Radio /MP3 /Bluetooth Power supply DC 14.4 V Parasitic current Max. 1mA (Head unit only) Antenna 80PF 75Ω Tuning type PLL SYNTHESIZED TUNING Components and components location Component Location 1.Categories
- Manuals Home
- Kia Stinger Owners Manual
- Kia Stinger Service Manual
- Hood Assembly
- Hood Seal Weatherstrip
- Hood Lifter
- Hood Weatherstrip
- Hood Insulator Pad
- Hood Latch Release Handle
- Hood Latch
- New on site
- Most important about car
Contents
