Kia Stinger CK: Front Seat Belt / Hood
Contents:
- Hood Assembly
- Hood Seal Weatherstrip
- Hood Lifter
- Hood Weatherstrip
- Hood Insulator Pad
- Hood Latch Release Handle
- Hood Latch
Repair procedures
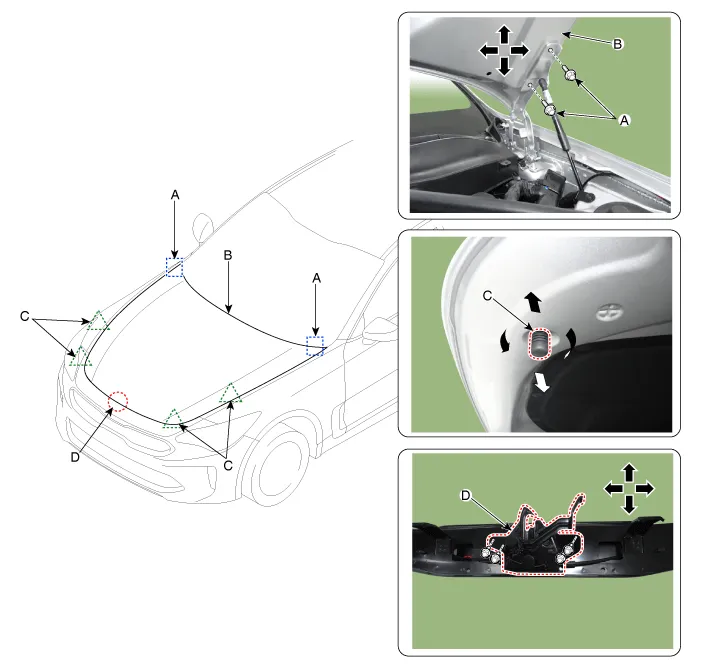
| Adjustment |
| 1. |
After loosening the hinge (A) mounting bolt, adjust the hood (B) by moving it up and down, or right and left. |
| 2. |
Adjust the hood height by turning the hood overslam bumpers (C). |
| 3. |
After loosening the hood latch (D) mounting bolts, adjust the latch by moving it up and down, or right and left.
|
Hood Assembly ➤
Hood Seal Weatherstrip
Repair procedures
| Replacement |
| 1. |
Detach the clip and then remove the hood seal weatherstrip (A).
|

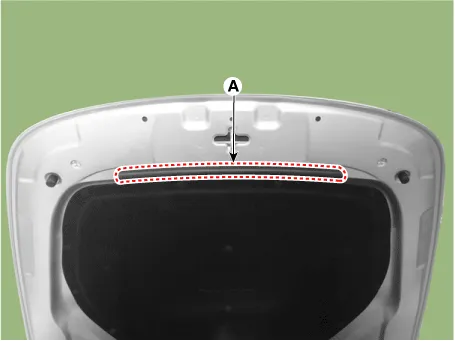
| 2. |
Install in the reverse order of removal. |
Hood Lifter ➤
Hood Weatherstrip
Repair procedures
| Replacement |
| 1. |
Detach the clip and then remove the hood weatherstrip (A).
|
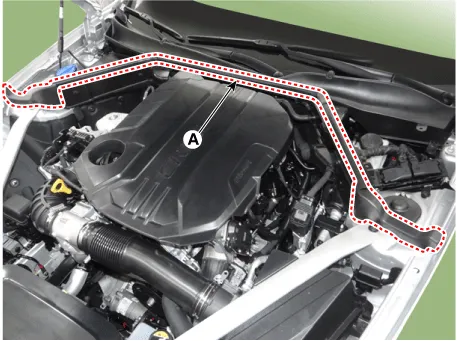
| 2. |
Install in the reverse order of removal. |
Hood Insulator Pad
Repair procedures
| Replacement |
| 1. |
Using a clip remover, detach the clips, and remove the hood insulator pad (A).
|
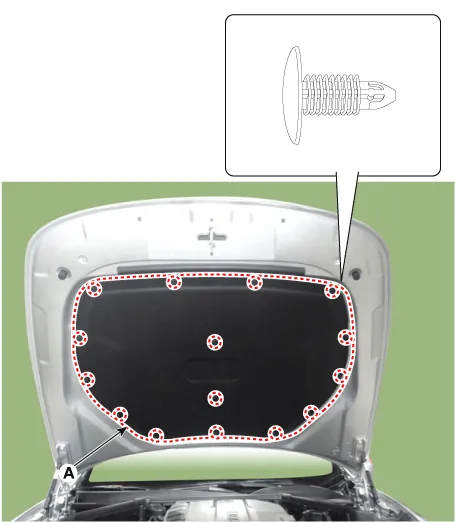
| 2. |
Install in the reverse order of removal.
|

Hood Latch Release Handle ➤
Hood Latch ➤


Other information:
Kia Stinger (CK) 2018-2023 Service Manual: Power Door Lock Module
Components and components location Components 1. Door lock/unlock knob cable 2. Door inside handle cable 3. Door latch assembly Repair procedures Inspection • When removing with a flat-tip screwdriver or remover, wrap protective tape around the tools to prevent damage to components.Kia Stinger (CK) 2018-2023 Service Manual: Fuel Delivery System
Components and components location Components Location Fuel Tank & Filler-Neck Assembly 1. Fuel Tank 2. Low Pressure Fuel Pump 3. Sub Fuel Sender 4. Fuel Filler Hose 5. Leveling Hose 6. Ventilation Hose 7. Filler-Neck Assembly 8. Fuel Pump Plate Cover Low Pressure Fuel Pump 1.Categories
- Manuals Home
- Kia Stinger Owners Manual
- Kia Stinger Service Manual
- Hood Assembly
- Hood Seal Weatherstrip
- Hood Lifter
- Hood Weatherstrip
- Hood Insulator Pad
- Hood Latch Release Handle
- Hood Latch
- New on site
- Most important about car
Contents
