
Kia Stinger CK: Front Seat Belt / Hood
Contents:
- Hood Assembly
- Hood Seal Weatherstrip
- Hood Lifter
- Hood Weatherstrip
- Hood Insulator Pad
- Hood Latch Release Handle
- Hood Latch
Repair procedures
| Adjustment |
| 1. |
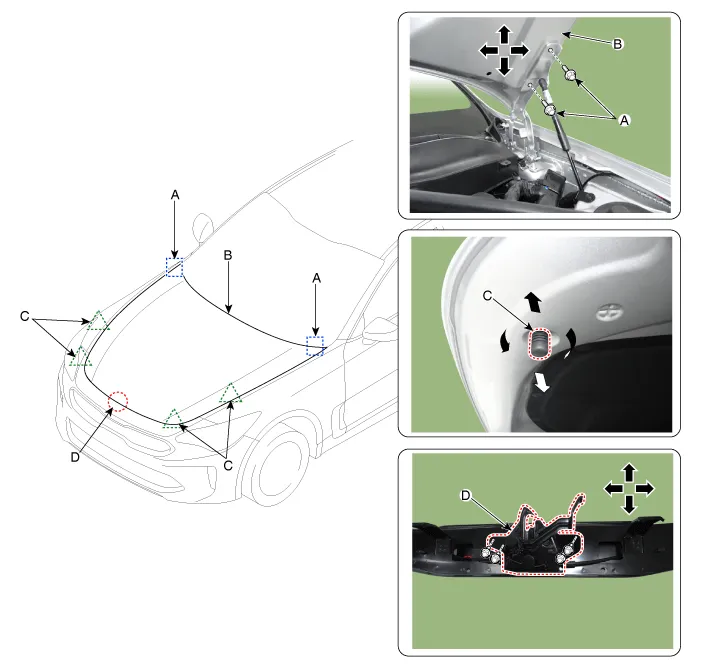
After loosening the hinge (A) mounting bolt, adjust the hood (B) by moving it up and down, or right and left. |
| 2. |
Adjust the hood height by turning the hood overslam bumpers (C). |
| 3. |
After loosening the hood latch (D) mounting bolts, adjust the latch by moving it up and down, or right and left.
|
Hood Assembly ➤
Hood Seal Weatherstrip
Repair procedures
| Replacement |
| 1. |
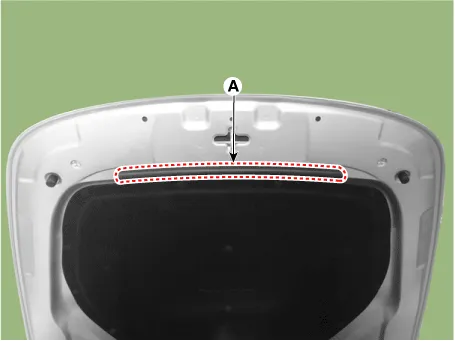
Detach the clip and then remove the hood seal weatherstrip (A).
|

| 2. |
Install in the reverse order of removal. |
Hood Lifter ➤
Hood Weatherstrip
Repair procedures
| Replacement |
| 1. |
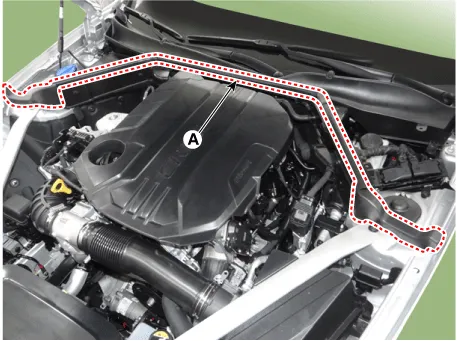
Detach the clip and then remove the hood weatherstrip (A).
|
| 2. |
Install in the reverse order of removal. |
Hood Insulator Pad
Repair procedures
| Replacement |
| 1. |
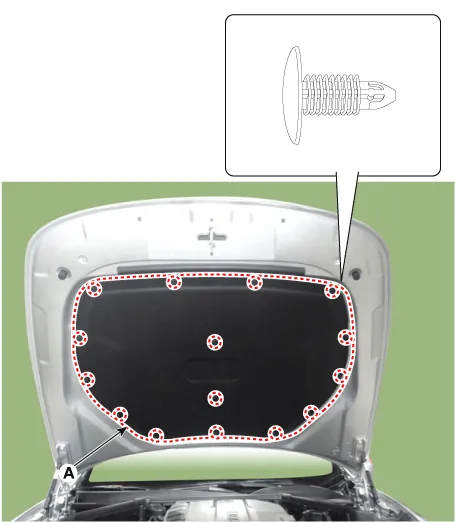
Using a clip remover, detach the clips, and remove the hood insulator pad (A).
|
| 2. |
Install in the reverse order of removal.
|

Hood Latch Release Handle ➤
Hood Latch ➤


Other information:
Kia Stinger (CK) 2018-2023 Service Manual: Transmission ranges
The indicator in the instrument cluster displays the shift lever position when the ignition switch is in the ON position. P (Park) Always come to a complete stop before shifting into P (Park). This position locks the transmission and prevents the drive wheels from rotating. Shifting into P (Park) while the vehicle is in motion will cause the drive wheels to lock which will cause you to lose control of the vehicle.Kia Stinger (CK) 2018-2023 Service Manual: Rear Shock Absorber
Components and components location Components 1. Lock nut 2. Rear insulator 3. Bumper stopper 4. Dust cover 5. Shock absorber Repair procedures Removal 1. Remove wheel nuts, rear wheel and tire (A) from hub. Tightening torque : 107.9 - 127.Categories
- Manuals Home
- Kia Stinger Owners Manual
- Kia Stinger Service Manual
- Hood Assembly
- Hood Seal Weatherstrip
- Hood Lifter
- Hood Weatherstrip
- Hood Insulator Pad
- Hood Latch Release Handle
- Hood Latch
- New on site
- Most important about car
Contents
